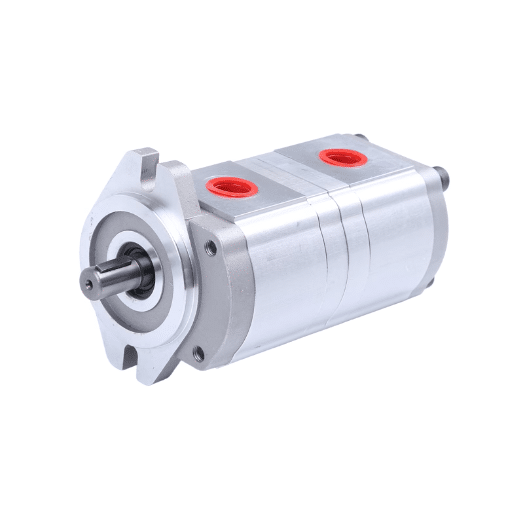
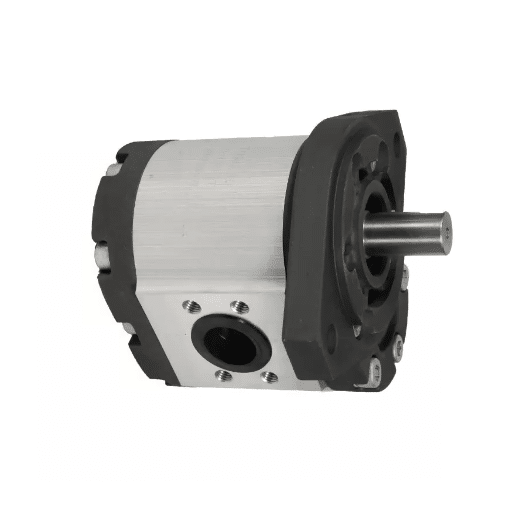
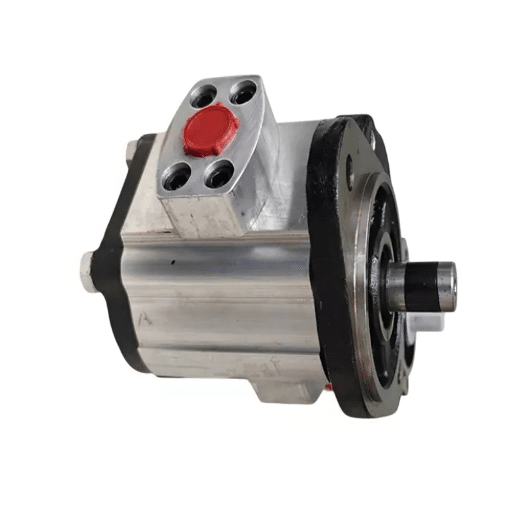
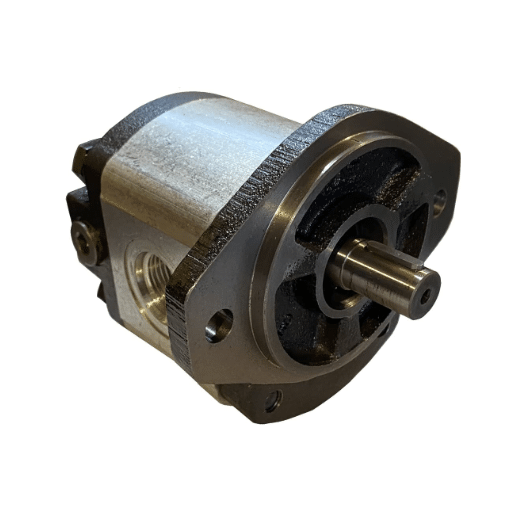
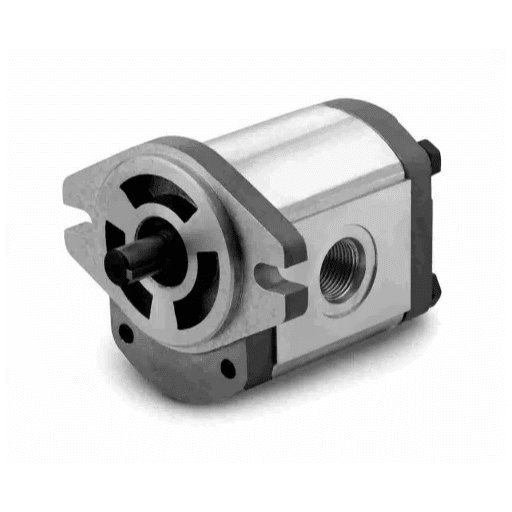
Owen is a maintenance technician at a quarry in County Tyrone. When the charge pump on a screening plant failed, he ordered a replacement that bolted straight onto the mounting flange, turned freely by hand, and primed without complaint. Ten minutes after start-up, the shaft seal failed, and oil ran down the bell housing.
The pump was built to run counter-clockwise. The machine drives clockwise. Nothing on the nameplate distinguished the two units, and nothing in the ordering process had asked.
That’s the gap this guide closes. Several of the parameters that decide whether a gear pump replacement actually fits are never printed on the pump. A buyer who checks only displacement and port size will find the mismatch under load, when it has already cost a seal or a shift.
Our complete guide to hydraulic gear pumps covers the family in general. This article is narrower: identify the pump, verify the replacement, decide between a rebuild and a new unit, install it correctly, and confirm the system came back to full performance.
Are Gear Pumps Interchangeable? The Short Answer
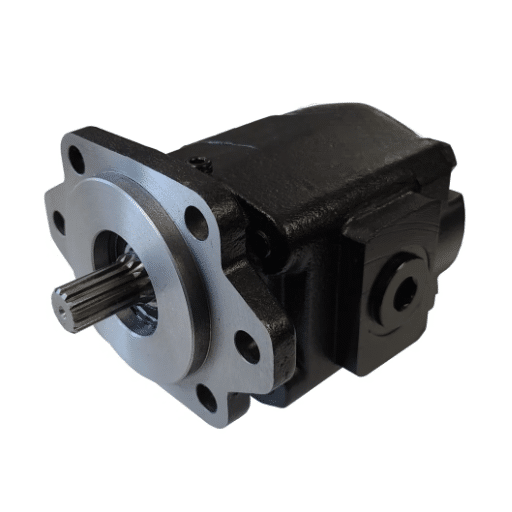
Are gear pumps interchangeable? Only conditionally. A gear pump replacement is a true drop-in only when seven interfaces match: displacement, pressure rating, mounting flange, shaft, porting, rotation direction, and fluid compatibility.
That list is longer than most buyers expect. Two pumps can share a bolt pattern, a shaft diameter, and a port thread, and still differ in rotation direction, internal relief configuration, or inlet tolerance. A genuine drop-in replacement is the rarer case, not the default.
| Outcome | What it means | What you still have to check |
|---|---|---|
| Exact replacement | Same manufacturer, same model code | Condition and documentation only |
| Drop-in equivalent | Different brand, all interfaces match | Shaft geometry, rotation and seals, in writing |
| Near-fit | Most interfaces match | Coupling, plumbing or bracket changes |
| Not compatible | One or more interfaces differ | Re-engineering, not replacement |
Most failed replacement projects sit in the third row. The pump was cross-referenced correctly, ordered correctly against that reference, and still needed a coupling change nobody costed into the downtime. Our log splitter pump replacement compatibility guide shows the same pattern in a single application.
Our applications engineers will review nameplate data against your machine. Send us your pump’s nameplate data for a compatibility review.
How to Identify Your Gear Pump: Reading the Nameplate and Model Code
Step 1: Find the Identification Data
Start at the pump, not the machine’s parts manual. The manual describes what was fitted at build. The pump on the bench may be a warranty replacement or a previous repair.
A nameplate or tag is the obvious location, but tags fall off and get painted over. On many cast-iron gear pumps, the model code is stamped directly into the flange lip, where it survives decades of grime. Clean that lip with a wire brush before concluding the pump is unidentifiable, then photograph the nameplate, shaft end, mounting flange, and port faces from two angles each, with a ruler in frame.
Record the model number and the serial number separately. The serial identifies the individual unit. The model code identifies the specification, and it is the only one that matters for a replacement.
Step 2: Decode the Model Code Block by Block
Almost every gear pump code follows the same logic, whether the manufacturer is European, American, or Asian:
series → displacement → shaft → flange → ports → rotation → design suffix
The blocks are separated by hyphens and letters rather than spaces, so the code reads as one string until you know where the boundaries sit. A few patterns show how differently manufacturers present the same information:
AZPF-12-005RRR12MB(Rexroth external gear pump): series and group, displacement field, rotation and option charactersPLP20.8D0-82E2(Casappa): series and group, displacement, mounting and rotation fieldHGP-2A-F10R(a group 2 unit): series, group size, flange, port thread, andRfor clockwise rotation
Treat these as illustrations of the pattern, not a universal key. Rotation letters vary by manufacturer: R for right-hand or clockwise and L for left-hand or counter-clockwise, D and S on some European codes, and digits such as 1 or 4 for clockwise and 2 or 5 for counter-clockwise on some North American codes. Design suffixes such as -6100 or RK03 are manufacturer-specific, and the ordering chart is the only authority for them.
Step 3: Measure What the Nameplate Does Not Show
When the nameplate is missing, damaged, or the pump is unbranded, measurement replaces decoding.
Displacement can be established geometrically. Disassemble the pump and measure the gear outside diameter, the gear thickness, and the centre-to-centre distance between the two gear shafts. Those three figures define the swept volume.
Then measure the interfaces the nameplate would have described, following the method published by suppliers:
| What to measure | Instrument | Why it matters |
|---|---|---|
| Bolt circle and pilot diameter | Vernier or caliper | Determines mounting compatibility |
| Shaft diameter and length | Micrometer | Determines coupling fit |
| Keyway width or spline tooth count | Caliper and visual count | The most common silent mismatch |
| Port thread or flange size | Thread gauge | Determines hose and adapter fit |
| Gear OD, thickness, centre distance | Micrometer | Establishes displacement |
Measure with the pump cold and clean. A shaft measured over a burr, or a flange measured over paint, produces a number that sends the wrong pump to site.
Gear Pump Replacement Checklist: The Seven Parameters That Decide Fit
Seven parameters decide whether a replacement gear pump will work. Miss any one and the consequences compound.
| Parameter | What to verify | Common mismatch | Consequence |
|---|---|---|---|
| Displacement | cm³/rev or in³/rev matches | Larger unit substituted “for headroom” | Changed cycle time, overloaded prime mover |
| Pressure rating | Continuous and peak | Lower-rated frame supplied | Housing or seal failure under load |
| Mounting flange | SAE A/B, European 4-bolt, bolt circle, pilot | Same bolt pattern, different pilot | Will not seat, or seats off-centre |
| Shaft | Diameter, length, keyway, spline, taper, tang | Spline tooth count differs | Coupling will not engage, or wears fast |
| Porting | Thread type, size, position, orientation | NPT specified against SAE O-ring boss | Leaks, or hoses that will not route |
| Rotation | CW, CCW or bi-rotation | Opposite-hand unit supplied | Seal rupture within minutes |
| Fluid and environment | Viscosity, temperature, seal material | Standard seals in high-temperature duty | Early seal failure |
Two things the table cannot carry. Maximum permissible speed is set by the lowest-rated component in the drive train, not by the pump alone. And displacement is rarely the parameter buyers get wrong in a gear pump replacement, because it is printed most prominently and therefore gets checked. Shaft spline count and rotation direction cause the most failures precisely because they are the least visible.
For the flange and port conventions behind rows three and five, our reference on SAE mounting and port standards covers the classes in detail. If you are checking whether the replacement’s displacement suits the duty rather than merely matching the failed unit, how to size a hydraulic gear pump works through the flow and power math.
Gear Pump Cross Reference vs Interchange: When It Is Safe

A cross-reference number is a starting point for identification. It isn’t a fit guarantee, and treating it as one is how the second failure happens.
A cross-reference confirms displacement, mounting, and porting. It does not confirm the shaft, the rotation direction, the internal relief configuration, or the seal material.
That single distinction explains why so many cross-referenced replacements arrive genuinely correct and still do not fit. The reference was accurate. It simply did not cover the parameter that mattered.
Priya, a plant engineer at a concrete products manufacturer, learned this on a backhoe loader. She ordered against a published cross-reference for a Parker tandem unit. The displacement, the mounting flange, and both port sizes matched the listing exactly.
The shaft spline count didn’t. The pump was right according to the reference and wrong for the machine, and the machine sat idle another week.
| What a cross-reference confirms | What it does not confirm | What to verify yourself |
|---|---|---|
| Displacement class | Shaft spline or keyway | Tooth count, measured diameter |
| Mounting interface family | Rotation direction | Confirmed in writing at order |
| Port type and size | Internal relief valve setting | Whether one is fitted, and at what pressure |
| General pressure class | Seal material and temperature range | Datasheet against operating conditions |
Interchange rests on shared standard interfaces rather than on any universal table. The SAE two-bolt and European four-bolt flanges, and the SAE and DIN port standards, are what make cross-brand gear pump replacement possible at all. Where a machine builder specified an OEM special, no catalogue line will match it, and a custom replacement is the only honest answer.
Rebuild or Replace? The Decision Thresholds
When a Rebuild Extends Service Life
Rebuilding is the right call when damage is confined to wearing parts, and the structure is sound. A pump that weeps from the shaft seal but still holds flow needs a seal and gasket kit. A pump with bearing noise or visible shaft play, but an undamaged housing, needs bearings and wear plates.
Typical kits contain seals, O-rings, drive and idler gears, bearings, wear plates, and gaskets. Kit prices typically run 40 to 60 percent below a new equivalent unit, which is why this decision is worth measuring rather than assuming.
When Replacement Is the Correct Call
Replace rather than rebuild when any of the following applies:
- The housing is cracked. Kits cannot address structural failure.
- The shaft is damaged beyond tolerance, whether bent, spalled, or pitted.
- Corrosion pitting is extensive across the housing.
- Gear face or housing bore erosion is measurable.
- The model is obsolete, and no kit is available.
- The unit has 10 or more years in service with repeat failures.
- Rebuild parts cost approaches the price of a remanufactured unit.
Quantified Rejection Tolerances
Rebuild conversations stall because “worn” is subjective until someone attaches a number. These thresholds come from published service documentation for cast-iron gear pumps and are used as rejection limits in repair practice.
| Measurement | Reject threshold | Source convention |
|---|---|---|
| Bearing bore out-of-round | More than 0.003 in | Manufacturer service manual |
| Inlet-side gear housing wear depth | More than 0.003 in | Manufacturer service manual |
| Housing cutout | 0.003 to 0.005 in | Industry repair practice |
| New pump bearing clearance, for comparison | 0.002 to 0.003 in | Manufacturer service manual |
| Flow loss against baseline | More than 15 to 20 percent | Rebuild trigger in repair practice |
Flow loss against baseline is a volumetric efficiency measurement. A pump that once delivered 100 L/min and now delivers 82 has lost roughly 18 percent to enlarged clearances. That is why 15 to 20 percent appears here as a rebuild trigger rather than as an arbitrary cut-off.
A rule of thumb in the repair trade is that if a rebuild exceeds roughly 60 percent of the cost of a new pump, gear pump replacement is the better economic decision. Treat it as a rule of thumb rather than a standard, and weigh it against your own downtime cost.
Aisha, a maintenance planner at a food processing plant, replaced two nominally identical pumps in the same month. Both were 11 years old. One had a sound housing, with bearing bores well inside the 0.003 in limit, and was rebuilt at less than half the price of a new unit.
The other showed inlet-side wear past the same threshold, and was replaced. Age didn’t drive either decision. The measurement did.
Our article on hydraulic gear pump maintenance covers the scheduled work that keeps a pump out of this decision for longer.
Diagnosis Before Gear Pump Replacement: Rule Out Everything Else
Not every loss of pressure or flow is a pump failure, and replacing a pump that was not the problem is an expensive way to leave the real fault in place.
Check these first: suction leaks and air ingress, fluid level and condition, a clogged filter or strainer, the relief valve setting, contamination, overheating, and drive speed. A relief valve set below working pressure, or a drive coupling slipping under load, produces exactly the symptoms of a worn pump.
There is a quick field test worth remembering. If the pump body heats up within seconds when system pressure is raised, the pump is likely the cause. If it stays cool while pressure fails to build, the restriction lies elsewhere. Heat is a diagnostic, not just a symptom.
One step is non-negotiable. After any contamination failure, flush the system, replace the filters, and refill with fluid filtered to the ISO 4406 cleanliness class the pump’s manual specifies, commonly 18/16/13 for cast-iron gear pumps. A gear pump replacement fitted into a system still holding metal debris will fail quickly, and the second failure will be blamed on the pump.
Callum manages a workshop for a plant hire fleet. He replaced a failed pump on an excavator without flushing the tank and cooler. The replacement failed within three weeks, and a third pump was ordered before anyone checked the oil. The second failure was a system problem, solved by flushing and filtration rather than by another pump.
For the full diagnostic tree, our gear pump troubleshooting guide works through symptoms by cause.
How to Replace a Hydraulic Gear Pump: Step Sequence

- Verify the replacement against all seven parameters before anything is unbolted.
- Depressurise the system and isolate the drive.
- Capture the oil and inspect it for metal, water, and discolouration.
- Disconnect the suction and pressure lines, then cap them immediately.
- Support the pump’s weight, remove the drive coupling, and retain all hardware.
- Confirm the replacement’s rotation and port orientation before bolting it up.
- Prime the pump, then verify rotation at first start before applying load.
Each step is expanded below, with the checks that matter.
Before You Start
Verify the replacement against all seven parameters. Do not proceed on a part number alone. Depressurise the system, isolate the drive, and capture the oil. What you find in it decides whether the system needs flushing before anything is fitted.
Removal
Disconnect the suction and pressure lines and cap them immediately. Support the pump’s weight before unbolting. Remove the drive coupling and retain the keys, spacers, and coupling hardware, since replacements rarely ship with them. Then unbolt and withdraw the pump.
Installation
Never apply axial or radial load to the pump shaft. Chain and belt drives are not suitable for a direct-driven gear pump shaft, and a side-loaded shaft fails at the seal and bearing long before it fails anywhere else.
Align the shaft and coupling carefully. Torque fasteners to the manufacturer’s figure; a representative gear pump mounting torque is 90 to 117 N·m (65 to 85 lb·ft), but confirm it against the specific pump’s manual. Use thread sealant paste on port threads, never PTFE tape, and never plumbing-grade fittings. Prime the pump before first start, because a dry start damages the internals before the pump has moved any oil.
Published installation practice adds one more detail: pumps weighing more than about 40 lb, or longer than 12 in, traditionally require rear support. If the original had a bracket, the replacement needs one too.
First Start and Commissioning
Verify rotation at first start before applying load. Check that the relief valve is set to specification. Run the machine unloaded, then load it gradually while watching for noise, heat, and leakage. After the first thermal cycle, recheck fastener torque and inspect the pump for weeps.
Rotation Direction: The Most Expensive Detail
Wrong rotation ruptures the shaft seal. Oil bypasses the seal and escapes at the drive end, and the pump is scrap within minutes of a start that sounded perfectly normal.
The convention is simple once you know it. View the pump with the input shaft facing you and the pump belly down. If the suction port is on the left, the pump rotates clockwise. If the suction port is on the right, it rotates counter-clockwise.
That’s the same rule published by manufacturers. It removes the guesswork from a nameplate that may not state rotation at all.
Bi-rotational pumps are reversible internally but still need correct plumbing. They usually have equal-sized ports, and they must have one assigned inlet and one assigned outlet, because suction and discharge are determined by the direction the shaft is driven. Three pump types generally cannot be reversed at all: magnetically driven or seal-less designs, pumps with different-sized inlet and outlet ports, and pumps with an integral relief valve in a fixed orientation.
Whatever the paperwork says, confirm rotation by test-fitting at low pressure and observing flow direction before committing to full load. It takes minutes, and it’s the cheapest insurance in this article.
For a detailed look, see our guide to the external gear pump.
Gear Pump Replacement Diagnostics: When the New Pump Underperforms
A correctly specified, correctly installed pump occasionally still underperforms. Work through the causes in order rather than starting at the pump.
| Symptom | Most likely cause after a replacement | First check |
|---|---|---|
| No pressure or very low flow | Wrong rotation, or no system resistance | Rotation, then whether the circuit is actually loaded |
| Pressure only when cold | Increased internal slip with hot, thin oil | Clearances, oil grade, operating temperature |
| Noise and heat on cold start | Suction starvation | Suction hose bore, strainer, tank level, oil viscosity |
| Rapid second failure | Contamination left in the system | Tank, lines, cooler, filter condition |
| Flow present, no pressure reading | Pump working against no head | Gauge location and circuit resistance |
Two entries catch more people than the rest. A pump moving fluid against no resistance reads close to zero on a pressure gauge while working perfectly. Pressure is a product of resistance, so the reading has to be read against the circuit.
Poor suction conditions explain the pump that performs well in summer and complains in winter, when cold, thick oil outruns the inlet. The noise sounds like a failing bearing. It’s usually a suction hose one size too small.
Internal causes come last. Excessive clearance between the gear end faces and the side plates, or between the tooth tips and the casing wall, lets pressure bypass back to the inlet. A sheared drive pin leaves the shaft turning with no pumping action at all, which looks identical to a rotation problem on the gauge and is found only by disassembly.
Replacing an Obsolete or Discontinued Gear Pump

Legacy series are discontinued constantly. Dowty, Commercial Hydraulics, and several truck-pump families have all passed through that transition, and the pumps on machines from that era are still failing today.
The most common mistake is specifying the OEM part number and nothing else. That locks the search to a single obsolete part and defeats the purpose of looking at all.
Give the supplier the complete data set instead: nameplate data, photographs of the shaft end, flange and ports, measured dimensions, system pressure and flow, oil type and viscosity, and the operating temperature range. With those, a modern equivalent can usually be identified without re-engineering the circuit.
Ask for the answer as a hierarchy: a drop-in candidate first, a near-fit second, a conversion option third. Where the original was an OEM special, expect a custom or semi-custom replacement rather than a catalogue unit. That’s a normal outcome, not a dead end.
If the obsolete unit is a multi-section design, our article on the tandem gear pump covers the section-ratio and coupling limits any replacement has to respect.
Sourcing a Replacement Gear Pump: What to Require From a Supplier
Replacement procurement is a specification-driven purchase, and the supplier’s documentation matters as much as the pump.
Require a technical data sheet per unit rather than a bare part number, and a dimensional drawing covering flange, shaft, and port geometry. Ask for rotation confirmation in writing at order, and pressure and flow test results or, at minimum, the test protocol.
Ask also for the seal and material specification against your operating fluid and temperature range, whether spare parts will be available for the replacement unit itself, and the lead time for standard versus custom configurations. The most useful thing a supplier can offer is interchange support: they’ll verify a cross-reference rather than simply publish one.
LOYAL INDUSTRIAL PTE. LTD. supplies replacement gear pumps factory-direct, with OEM customisation to drawings where the original was proprietary, multi-stage quality control and performance testing before shipment, full technical documentation, and export packaging built for international freight. Our overview of hydraulic gear pump manufacturers and OEM sourcing covers supplier vetting in more detail.
Request a replacement pump cross-reference and quotation with your nameplate data, measured dimensions, and system conditions, and we will confirm the fit before the unit is built.
Frequently Asked Questions
Are hydraulic gear pumps interchangeable?
Only when every interface matches: displacement, pressure rating, mounting flange, shaft, porting, rotation direction, and fluid compatibility. A shared bolt pattern and port size is not enough.
How do I identify my hydraulic gear pump if the nameplate is gone?
Measure instead. Establish displacement from gear outside diameter, gear thickness, and centre distance, then measure the bolt circle, pilot diameter, shaft dimensions, and port sizes. Check the flange lip before concluding the data is missing, because many pumps are stamped there rather than on a tag.
How do I determine the rotation direction of a gear pump?
View the pump with the input shaft facing you and the belly down. Suction on the left means clockwise. Suction on the right means counter-clockwise.
Is a cross-reference number guaranteed to fit?
No. A cross-reference confirms displacement, mounting, and porting class. It says nothing about shaft geometry, rotation direction, internal relief, or seal material, all of which must be verified separately.
Should I rebuild or replace my hydraulic gear pump?
Rebuild when damage is confined to wearing parts, and the housing is sound. Replace when the housing is cracked, the shaft is damaged beyond tolerance, erosion is measurable, the model is obsolete, or the rebuild cost approaches a remanufactured unit.
Why is my new gear pump not building pressure?
Check rotation direction first, then whether the circuit is actually loaded, then suction condition, drive speed, and relief valve setting. A pump pushing fluid against no resistance reads near zero while working correctly.
Can I use a larger-displacement pump as a replacement?
It will fit and move more oil, but it also draws more torque, changes cycle times, and may exceed the prime mover’s capability. Match the original displacement unless the whole circuit is being re-sized deliberately.
Conclusion
Gear pump replacement goes wrong for predictable reasons, and every one of them is avoidable with a measurement and a question.
- Interchangeability is conditional. Two pumps can share a bolt pattern and still differ in shaft, rotation, or pressure rating.
- Several parameters that decide fit, including spline count and rotation direction, are not printed on the nameplate.
- A cross-reference confirms displacement, mounting, and porting, and nothing else.
- Rebuild or replace is a measured decision, not an age decision. Bearing bore out-of-round beyond 0.003 in, and inlet-side wear past the same depth, are rejection points in repair practice.
- Rotation is confirmed in writing at order and verified at first start before any load is applied.
Identify, measure, verify in writing, then install with rotation confirmed first. That sequence is the whole method, and it costs less than one unplanned stoppage.
Gerald, a maintenance manager at an aggregates operator, now keeps a laminated compatibility checklist in the workshop and a photograph of every pump nameplate on file before the pump goes back into service. His replacement failures stopped. Not because the pumps improved, but because the specification did.
If you have a failed pump and its nameplate data, contact LOYAL INDUSTRIAL PTE. LTD. for a gear pump replacement cross-reference review, a technical data sheet, or an OEM replacement specification. Send the photographs and measurements, and our engineers will confirm the fit before the unit is built.