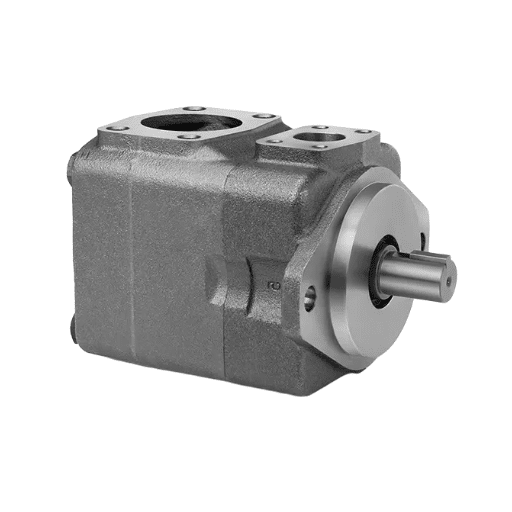
Priya had the work order written before she opened the pump. An injection moulding machine’s vane pump had developed a whine that climbed with injection pressure, and at operating temperature it moved roughly 15% less oil than the nameplate curve promised. Worn cartridge, she assumed, and a replacement was already on order.
Then she put a gauge on the suction line. The pump was running in vacuum, past the point where dissolved gas comes out of hydraulic oil. A partly blocked inlet filter had been starving it for months, so the vanes were lifting off the cam ring on the suction side and slamming back onto it every discharge cycle. A new cartridge would have failed the same way, because the restriction lived in the circuit, not the pump.
Vane pumps are the most audible family in fluid power. That is an advantage: they announce starvation, wear, and misalignment early, and each symptom narrows the cause. The problem is that most vane pump troubleshooting stops at the symptom. This guide does not.
Scope note: this article covers industrial hydraulic vane pumps, single-acting and double-acting, fixed and variable. It is not about rotary vane vacuum pumps or sliding vane fluid-transfer pumps, which share the name and little else. If you are still learning the family, start with our complete guide to hydraulic vane pumps.
What follows is a six-step diagnostic sequence, a quantified symptom-to-cause chart, a sound decoder, and the cavitation-versus-aeration test. The last section gives you the repair-versus-replace thresholds.
Mid-failure and need a decision today? Request a technical specification sheet, and we will confirm the correct cartridge, vane set, and seal kit for your frame size.
Start Here: A 6-Step Vane Pump Troubleshooting Sequence

Work these steps in order before you loosen a single bolt. Most vane pump faults are found at step three, because this family is disproportionately sensitive to what happens upstream of it.
Safety first. Lock out and tag out the drive. Relieve all stored pressure and cycle the actuators to zero before opening anything. Hydraulic fluid at working pressure can inject through skin, and that is a surgical emergency, not a workshop inconvenience.
- Fluid. Check level, temperature, colour, foam, and cloudiness. Cloudy oil is oil that has given up dissolved gas.
- Sound. Characterise the noise before you touch anything. Gravel rattle, whine, knock, and screech each point somewhere different.
- Suction condition. Fit an absolute-pressure gauge downstream of the inlet filter. Confirm no strainer is fitted on the suction line.
- Pressure and flow. Compare pump output against the relief or compensator setting, then isolate the pump from the system.
- Temperature. Measure the pump housing against the reservoir. A large delta means internal leakage.
- Externals. Inspect the shaft seal, drain-line pressure and routing, coupling alignment, and mounting bolts.
If you skip step three, you will spend money on cartridges. Priya nearly did.
Vane Pump Troubleshooting Chart: Symptoms, Causes and Field Fixes
The tables below map what you observe to the most probable cause and the first thing to check. Each row carries a measurable threshold, because “check against specification” is not a diagnosis.
No Flow or No Pressure
| Clue | Likely cause | First check |
|---|---|---|
| Pump turns, nothing at the gauge | Wrong rotation direction; vane pumps are directional. Or a sheared shaft key | Verify rotation against the housing arrow; inspect the key and coupling |
| No flow on a new installation | Port plate or vanes fitted backwards; a dust plug left in a port | Verify plate orientation; remove shipping plugs |
| No flow, pump hot and dry | Pump not primed; air-locked suction | Fill the housing through the outlet, bleed at the highest point, restart |
| Pressure builds, then collapses | Relief valve stuck open or set below the load | Block the outlet and isolate pump from valve |
Flow Below Rated
| Clue | Likely cause | First check |
|---|---|---|
| Low flow at every temperature | Internal leakage past worn vanes, cam ring, or side plates | Volumetric-efficiency test at rated pressure |
| Acceptable cold, weak when hot | Clearances open as viscosity falls with wear | Confirm with flow at operating temperature; plan a rebuild |
| Sudden flow loss | A vane stuck in its slot by a burr or varnish | Oil analysis, then clean the slots and change the oil |
| Flow pulsing | Intermittent vane sticking; aeration | Check vane freedom and suction integrity |
Not Enough Pressure Under Load
| Clue | Likely cause | First check |
|---|---|---|
| Reaches setting unloaded, sags under load | Internal leakage that rises with pressure | Compare volumetric efficiency against the OEM acceptance value |
| Low pressure, normal flow | Relief or compensator set too low | Adjust to specification against a calibrated gauge |
| Cannot reach setting at all | Vanes or cam ring worn past tolerance | Measure vane thickness and inspect the ring profile |
| Pressure hunts | Partially stuck vane; unstable compensator on a variable pump | Inspect vane freedom and the compensator spool |
Unusual Heat
| Clue | Likely cause | First check |
|---|---|---|
| Housing hotter than the reservoir | Internal leakage across worn clearances | Volumetric-efficiency test; rebuild threshold |
| Hot within minutes of start | Continuous flow across the relief valve; a dead-headed circuit | Confirm the circuit is not dead-headed; check valve settings |
| Hot only under load | Undersized cooler; degraded oil; wrong viscosity | Cooler capacity, oil analysis, viscosity at temperature |
| Hot with foamy oil | Aeration | Fix the suction side; see the cavitation section below |
Sustained operation above about 60 °C (140 °F) hardens shaft seals and accelerates wear. Keep continuous duty between 15 °C and 60 °C, with roughly 65 °C as the ceiling.
Shaft Seal Leakage
| Clue | Likely cause | First check |
|---|---|---|
| Weep at the front end with dark grease | Bearing failure damaging the seal | Replace bearing and seal; check alignment |
| Seal hardened, leaking after a heat history | Prolonged overheating | Correct the thermal problem, then replace the seal |
| A groove worn in the shaft | Abrasive particles embedded in the seal lip | Replace or sleeve the shaft, not just the seal |
| Leak with raised drain pressure | Drain line pressurised above 2 bar | Re-route the drain below oil level, unrestricted |
Erratic Flow or Pressure
| Clue | Likely cause | First check |
|---|---|---|
| Output hunting at steady load | Sticking vane; unstable compensator; air in the fluid | Vane freedom, compensator spool, suction integrity |
| Intermittent loss of output | Intermittent vane stick; loose coupling | Teardown inspection; coupling check |
What the Noise Tells You: A Vane Pump Sound Decoder

Noise is the earliest vane pump symptom and the most diagnostic. A healthy vane pump is the quietest industrial pump family, typically 55 to 75 dB(A) depending on design. Any new noise is information.
| Sound | Most likely cause | First check |
|---|---|---|
| Gravel or marbles rattle | Cavitation | Suction restriction, absolute inlet pressure, viscosity |
| High-pitched whine that rises with system pressure | Cavitation from a restricted inlet | Inlet filter, suction hose, fluid level |
| Rhythmic clatter at shaft speed | Worn or sticking vanes rattling in the rotor slots | Vane thickness, rotor slot clearance |
| Loud under pressure together with reduced flow | Cartridge failure | Teardown; do not confuse this with cavitation |
| Low drone or hum | Coupling misalignment or soft foot | Alignment and mounting |
| Banging or knocking | Aeration, not cavitation | Suction joints, shaft seal, reservoir level |
| Screech or grind | Internal mechanical damage | Stop the machine immediately |
You can confirm an rpm-matched mechanical noise with the vane pass frequency: f = (n × z) / 60, where n is shaft speed in rpm, and z is the number of vanes. If the measured noise frequency lands on the vane pass frequency, the fault is vane-related. If it matches shaft 1× or the coupling frequency, look at alignment and bearings instead.
Hugo chased a “worn pump” for two weeks on a hydraulic press. The clatter matched vane pass frequency, so the cartridge looked guilty. But the vane tips measured within tolerance. The real fault was a compensator spool sticking on the variable-displacement pump, causing the pressure to hunt and the vanes to load and unload. Cleaning the spool cured the noise, and the original cartridge was still in service a year later.
Cavitation vs Aeration in Vane Pumps
These two get used interchangeably in most troubleshooting pages. They are different faults with different fixes, and the distinction saves money.
| Cavitation | Aeration | |
|---|---|---|
| What it is | The fluid itself vaporises at a low-pressure point | Air is entrained into the fluid from outside the circuit |
| Bubble source | Inside the oil, from vapour | Outside: leaky joints, shaft seal, low level, return line above fluid |
| Sound | Gravel or marbles rattle | Banging or knocking |
| Oil appearance | Often normal in the reservoir | Foamy and cloudy |
| Field test | Monitor absolute pressure at the pump inlet | Grease Test on suspected joints and the shaft seal |
| Fix | Remove the inlet restriction | Seal the ingress point; re-pipe the return below the fluid level |
The Grease Test for aeration is quick: smear grease around the suspected suction joints and the shaft seal while the pump runs. If the noise changes, air is being drawn in at that point.
The decisive field rule for cavitation is this. When noise worsens as system pressure rises, you almost certainly have a restricted inlet. Hot oil and a worn pump do not behave that way. That single observation is worth more than a day of guessing.
The reason vane pumps suffer more than gear pumps comes down to the vanes themselves. A gear pump’s teeth are always in mesh, so a little air changes efficiency but nothing mechanical. A vane pump has to extend its vanes outward and hold them against the cam ring through every revolution. Anything that reduces the force holding them out produces immediate mechanical damage. Our guide to how a vane pump works covers the force balance that makes this possible.
Why Inlet Vacuum Destroys Vane Pumps: Washboarding and Vane Hammering
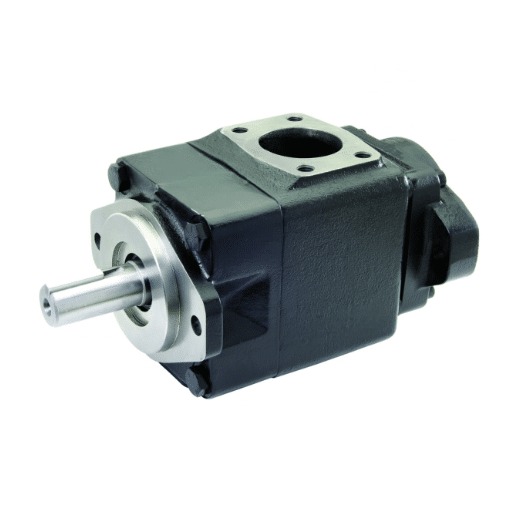
This is the failure mechanism that defines the vane family, and it is worth understanding before you buy parts.
Some suction depression is normal. Parker’s vane pump service manual puts the threshold at roughly 100 to 150 mmHg, about 0.2 bar of depression. Beyond that, dissolved gas, typically 6 to 7% by volume in hydraulic oil, comes out of solution as bubbles of about 0.2 to 0.3 mm. The oil turns cloudy, and the pump has lost its working fluid.
Then the mechanism turns mechanical. Under excessive inlet vacuum, the vanes lose contact with the cam ring on the suction side. As the rotor carries them round to the discharge side, pressurised fluid hammers them back onto the ring. That impact repeats every revolution, wearing the vane tips and the ring together.
The cam ring records the damage as washboarding: a rippled, corrugated profile. Parker notes that the depth of those ripples is proportional to the strength of the inlet depression, which makes the ring a permanent record of how badly the pump was starved. A washboarded ring cannot be recovered, and the failure that follows is rapid and catastrophic rather than gradual.
The prevention rules are specific to vane pumps:
- Do not fit an inlet strainer. Continental Hydraulics calls suction strainers “a leading cause of cavitation which manifests as excessive noise” in its PVX service documentation. If a strainer is unavoidable, use 250 µm or coarser and monitor its pressure drop.
- Fit a gauge or transducer downstream of the inlet filter so absolute inlet pressure is visible, not assumed.
- Keep inlet velocity between 0.5 and 1.9 m/s and discharge velocity at or below 6.0 m/s.
- Keep the return line discharging below fluid level and away from the suction connection, with baffle velocity under 0.5 m/s so air can separate.
The full filtration and inlet-hygiene program belongs with scheduled work, which our vane pump maintenance guide covers in detail. This section is about recognising the damage after it has happened.
Vane Pump Failure Modes and the Field Tests That Confirm Them
When a vane pump does come apart, the components fail in recognisable ways. Knowing them tells you whether a cartridge kit will fix the pump or whether you need a replacement.
- Vane tip wear and frosting. Abrasive particles near clearance size act as liquid sandpaper between the vane tip and the cam ring. Look for frosted, blunted, or chipped tips. As a representative limit, vane thickness worn below about 0.5 mm of the OEM dimension is out of tolerance, though you should confirm that against your specific pump manual.
- Cam ring scuffing and washboarding. Scuffing and metal smearing come from contamination; corrugated ripples come from starvation. A lightly rippled ring can sometimes be polished. Washboarding and heavy decomposition cannot be recovered.
- Port plate and side plate erosion. Cratering, pitting, and black marks on the vane lips and plates are the signature of cavitation-bubble implosion. If you find them, investigate the inlet before replacing anything, or the new parts will erode the same way.
- Vane sticking in the rotor slots. Burrs, wear debris, varnish from overheated oil, or water ingress all cause a vane to bind. Expect erratic flow, rhythmic clatter, and sometimes total loss of output if a vane jams fully retracted. Clean or replace the rotor and vanes, then change the oil; cleaning the slots alone leaves the varnish source in place.
- Bearing and shaft seal failure. Misalignment, a bent shaft, an over-tensioned belt drive, or contamination all load the bearings. Continental Hydraulics specifies alignment within 0.006 in (0.152 mm) TIR. A ruptured shaft from a seized rotor is a terminal failure, and the cartridge is scrap.
Three field tests confirm what you suspect before you commit to a teardown.
Blocked-outlet isolation test. With the pump running at low load, momentarily block the pressure outlet. If pressure climbs to the relief setting, the pump is sound, and a system valve is at fault. If it stays low, the fault is internal.
Volumetric-efficiency check. Measure actual flow at rated pressure against theoretical flow. A drop below about 50% signals severe internal wear. For reference, a healthy vane pump runs near 92% single-acting and above 94% double-acting at rated conditions. The theoretical flow calculation is in our guide to vane pump sizing.
Housing-versus-reservoir temperature delta. A pump running materially hotter than its reservoir is turning pressure into heat through internal leakage.
One scope note that catches technicians trained on piston pumps: a vane pump has no case drain flow measurement as its wear metric. External leakage on a vane pump appears at the shaft seal, not at a case drain port, so do not go looking for a flow figure that does not exist.
Vane Pump Repair vs Replace: Decision Thresholds

Vane pumps are the most repairable industrial pump family, because the rotating group lifts out as a cartridge. That is why the decision is usually about the housing, not the pump.
Treat the following as industry rules of thumb rather than fixed rules, and confirm them against OEM parts pricing. Roughly 70% of vane pump faults are repairable, and repair typically costs 40 to 60% less than replacement.
| Situation | Decision |
|---|---|
| Wear within tolerance; seal or bearing failure only | Repair with a seal kit or bearing set |
| Vane tip, cam ring or side plate wear; housing sound | Repair with a cartridge kit |
| Casing cracked or deformed | Replace the pump |
| Internal wear beyond roughly 30% of OEM tolerance | Replace the pump |
| Housing bore washboarded | Replace the pump |
| Repair cost above roughly 70% of a new pump | Replace the pump |
Whatever you choose, fix the root cause first. Flush the circuit, restore filtration, and correct the inlet condition before the new parts go in. Parker attributes about 80% of vane pump failures to fluid contamination, and the classic premature-failure window is the first 500 hours of service. A cartridge fitted into an unchanged contaminated circuit fails on the same schedule.
Preventing the Failure You Just Diagnosed
Diagnosis is only worth the prevention that follows it. Three numbers carry most of the result.
Run ISO 4406 18/16/13 as the target for maximum component life, with banded targets by pressure for less demanding systems. Use 10 µm absolute return filtration on precision vane pumps and treat 25 µm absolute as the acceptable minimum elsewhere. Note that a filter sold as “25 micron” nominal is not the same product as 25 µm absolute. Keep fluid between 15 °C and 60 °C continuously, drain pressure at or below 2 bar, and no inlet strainer.
Inspect the fluid level, filter differential pressure, and shaft seal monthly, and trend absolute inlet pressure so starvation shows up before the vanes do. The schedule, oil selection, and wear-limit tables live in our vane pump maintenance program.
FAQ
What are the symptoms of vane pump cavitation?
A gravel or marbles rattle, often worse as system pressure rises, with a restricted inlet filter or suction line as the cause. Monitor absolute pressure at the pump inlet to confirm it. Cloudy oil indicates gas has come out of solution.
What is the difference between cavitation and aeration in a vane pump?
Cavitation is the fluid vaporising at a low-pressure point and sounds like gravel. Aeration is outside air entering the circuit and sounds like banging, with foamy oil in the reservoir. Cavitation is fixed at the inlet; aeration is fixed at the leak.
Why is my vane pump so noisy?
Match the sound to the table above. Noise that rises with system pressure points to a restricted inlet. Rhythmic clatter at vane pass frequency points to worn or sticking vanes. A low drone usually means coupling misalignment.
Why is my vane pump not building pressure?
Isolate first. Block the outlet and see whether pressure reaches the relief setting. If it does, a system valve is passing internally. If it does not, measure vane thickness and volumetric efficiency to find the internal leakage.
What causes vanes to stick in a vane pump?
Burrs and wear debris in the rotor slots, varnish from overheated oil, and water ingress. Cleaning the slots without changing the oil leaves the cause in the system, so the fault returns.
What is washboarding in a vane pump?
A rippled, corrugated wear pattern on the cam ring. It forms when excessive inlet vacuum makes the vanes lose contact with the ring and hammer back onto it each revolution. The ripple depth reflects how badly the pump was starved.
Should a vane pump have a suction strainer?
No. A suction strainer creates the inlet vacuum that causes vane hammering and cavitation. Filter on the return line instead. If a strainer is unavoidable, use 250 µm or coarser and monitor its pressure drop.
Can a vane pump be repaired instead of replaced?
Usually, yes. Around 70% of vane pump faults are repairable, and repair typically costs 40 to 60% less than replacement. Replace only if the casing is cracked, the housing bore is washboarded, or internal wear exceeds roughly 30% of OEM tolerance.
Conclusion
Vane pump troubleshooting rewards a sequence. Read the fluid, then the sound, then the suction condition. Most faults are already visible at the inlet before anyone removes a bolt.
Five things carry most of the outcome. Vane pumps are directional and inlet-sensitive, so verify rotation and absolute inlet pressure first. Noise that rises with system pressure means a restricted inlet. Washboarding on the cam ring is the permanent record of starvation, and it cannot be polished out. The blocked-outlet test separates a pump fault from a valve fault in minutes. And whatever you replace, fix the root cause first, or the new cartridge inherits the old failure.
Priya’s moulding machine went back into service with the original cartridge, a cleared inlet filter, and a gauge on the suction line. The whine stopped the same shift. The pump had been telling her what was wrong from the beginning.
Request a technical specification sheet, or get a cartridge kit and seal kit recommendation → LOYAL INDUSTRIAL PTE. LTD. supplies vane, gear, and piston families from one verified source, with performance testing on every unit, factory-direct pricing, OEM customization, and global export support.