Ray Dominguez managed a sixteen-truck dump fleet in southern Texas. In one quarter, his shop replaced four hydraulic pumps at $1,400 each. Every failed pump showed the same symptom: the dump bed would rise halfway, stall, and drift back down. His mechanic blamed the pumps. Ray ordered replacements. Three weeks later, the new pumps failed the same way. The fifth visit from a hydraulic specialist revealed the truth. A $150 seal kit on the original pump would have solved the problem. The shaft seal had worn past its tolerance, allowing air to enter the system and causing cavitation that destroyed internal gears. Ray had spent $5,600 replacing pumps when a $150 repair and three hours of bench work would have kept his fleet running.
If you maintain a dump truck fleet, run a repair shop, or operate a single dump truck for your business, this scenario repeats itself every day across the industry. Most dump truck hydraulic pump failures are misdiagnosed. The pump gets blamed for symptoms caused by contaminated fluid, worn couplers, or system-level problems. Replace the pump without fixing the root cause, and you will replace it again.
This guide covers dump truck hydraulic pump repair from diagnosis through completion. You will learn how to diagnose pump problems systematically, when to repair versus replace, how to replace seals and couplers, how to rebuild a gear pump step by step, and how to prevent repeat failures. By the end, you will have a complete framework for restoring hydraulic pump performance at a fraction of replacement cost.
For the complete system architecture that connects pumps to cylinders, valves, and reservoirs, see our dump truck hydraulic pump system guide.
How to Diagnose Dump Truck Hydraulic Pump Problems

Before starting any dump truck hydraulic pump repair, diagnose the problem systematically. Replacing or rebuilding a pump without identifying the root cause wastes money and guarantees repeat failure. According to fluid analysis laboratories, approximately 70 percent of hydraulic pump failures trace back to contamination, not component wear. A structured diagnostic process prevents the mistake Ray Dominguez made: replacing good pumps while ignoring the real problem.
Symptom-to-Cause Diagnostic Matrix
The following table maps common symptoms to their most likely causes and the field test that confirms each diagnosis.
| Symptom | Possible Cause | Field Test | Fix |
|---|---|---|---|
| Slow or weak lift | Worn pump gears | Pressure test at pump outlet | Rebuild or replace pump |
| Slow or weak lift | Clogged filter | Check differential pressure across filter | Replace filter |
| Slow or weak lift | Internal cylinder bypass | Block cylinder and test pump pressure | Repair cylinder |
| No lift at all | Sheared coupler shaft | Check if pump shaft spins with PTO engaged | Replace coupler |
| No lift at all | PTO not engaging | Verify PTO indicator light and engagement sound | Repair PTO |
| Whining or grinding noise | Cavitation (air ingress) | Check fluid level and suction line for leaks | Fix leak, bleed system |
| Whining or grinding noise | Worn bearings | Listen for pitch change under load | Rebuild pump |
| Overheating (>180℉) | Internal bypass (wear) | Measure flow at pump outlet vs. spec | Rebuild pump |
| Overheating (>180℉) | Low fluid level | Check reservoir sight glass | Top off fluid |
| External leak at pump | Shaft seal failure | Inspect pump shaft for scoring | Replace seals |
| External leak at pump | Loose fittings | Torque check all connections | Retorque fittings |
Step 1: Check Hydraulic Fluid Level and Condition
Open the reservoir and inspect the fluid. Clean hydraulic oil appears amber or light brown. Milky fluid indicates water contamination. Dark brown or black fluid suggests thermal breakdown. Metallic particles or sludge indicate internal component wear. If the fluid shows any of these conditions, drain and flush the system before blaming the pump. Contaminated fluid will destroy a new or rebuilt pump within weeks.
Step 2: Inspect for External Leaks
Walk around the pump, hoses, fittings, and cylinder. Look for wet spots, drips, or accumulated dirt stuck to oil residue. Pay special attention to the pump shaft seal area. A shaft seal leak often appears as a slow weep that collects dust, making it visible even when the leak rate is low. Tighten fittings to specification and recheck. If the leak originates from the pump housing or shaft area, the pump requires seal replacement or rebuild.
Step 3: Test System Pressure at the Pump Outlet
Install a 0-4,000 PSI gauge at the pump test port. With the engine at 1,200-1,500 RPM and the PTO engaged, read the pressure with no load (open center valve). A healthy pump should produce system relief pressure, typically 2,500-3,000 PSI for most dump truck applications. If the pressure reads below the specification, the pump has internal wear. If pressure reads zero, check the coupler shaft and PTO engagement first.
Step 4: Check for Air in the System (Cavitation)
Cavitation produces a distinctive whining or grinding noise that changes pitch under load. Check the reservoir for foamy or aerated fluid. Inspect suction line fittings for cracks or loose clamps. A leaking suction line allows air to enter the pump inlet, creating vapor bubbles that collapse violently inside the pump housing. This collapse erodes gear surfaces and destroys seals. Fix any suction-side leaks before proceeding with pump repair.
Step 5: Isolate the Pump from the Cylinder and Valve
If pressure and flow test normal at the pump outlet but the cylinder still moves slowly or weakly, the problem may lie in the control valve or cylinder, not the pump. Block the cylinder ports and retest the pump pressure. If the pump holds relief pressure with the cylinder isolated, the pump is functioning correctly. Inspect the control valve for spool wear and the cylinder for internal bypass. For cylinder diagnostic and repair procedures, see our dump truck hydraulic cylinder guide.
Need a hydraulic pump specification review or replacement quote? Contact our engineering team for a compatibility assessment and customized procurement recommendation.
Common Dump Truck Hydraulic Pump Failures and Their Causes
Understanding why pumps fail prevents repeat failures. Each failure mode produces distinct symptoms and requires a specific repair approach. Replacing a pump without addressing the underlying cause guarantees the replacement will fail the same way.
Cavitation: Air Ingress and Its Destruction
Cavitation occurs when air enters the pump inlet and forms vapor bubbles in the low-pressure zone between gear teeth. As the gears mesh and pressure rises, these bubbles collapse violently, creating micro-jets of fluid that erode metal surfaces. Cavitation damage appears as pitting on gear teeth, scoring on the housing bore, and erosion of the end plates. The primary causes are low fluid level, leaking suction fittings, clogged suction strainers, and excessively high pump speed. Operating a pump above its rated RPM, often caused by incorrect PTO ratio selection, accelerates cavitation dramatically.
Contamination: Dirt, Water, and Metal Particles
Contamination is the leading cause of hydraulic pump failure. Particles as small as 10 microns score gear surfaces and destroy seal lips. Water in the fluid reduces lubrication and causes rust on precision surfaces. Metal particles from component wear create a feedback loop: wear generates particles, and particles cause more wear. The most common contamination sources include dirty fill methods, failed breathers, worn cylinder seals allowing external contaminants past the wiper, and inadequate filtration. ISO cleanliness target for most hydraulic systems is 18/16/13 or cleaner.
Overheating: Fluid Breakdown and Seal Degradation
Hydraulic fluid should operate below 180 degrees F (82 degrees C). Above 200 degrees F (93 degrees C), fluid oxidation accelerates, seals harden and crack, and viscosity drops below the minimum needed for proper lubrication. Common causes of overheating include low fluid level, restricted return lines, undersized reservoirs, continuous relief valve bypass, and internal pump leakage creating friction heat. A pump running hot is telling you something is wrong upstream or downstream.
Worn Seals and Shaft Leaks
The shaft seal is the most common leak point on a dump truck hydraulic pump. The seal lip rides on the shaft surface and wears gradually over time. Shaft scoring from contaminated fluid accelerates seal wear. A worn shaft seal allows fluid to leak externally and air to enter the system, creating both a mess and a cavitation risk. Replacing the seal without inspecting the shaft surface is a common mistake that leads to immediate re-failure.
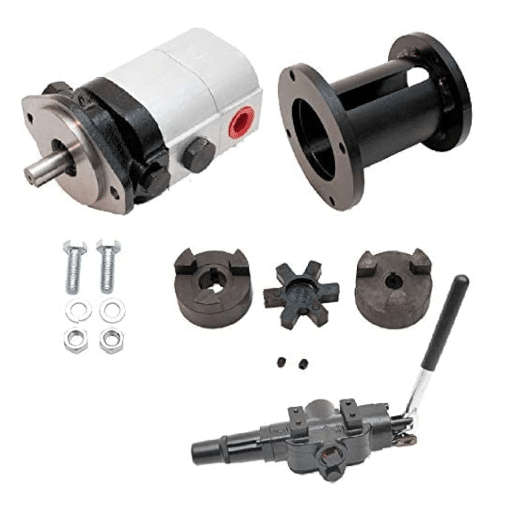
Coupler Shaft and PTO Coupling Failure
The coupler shaft connects the PTO output to the pump input shaft. It transmits all the torque the pump requires. Worn splines on the coupler shaft cause intermittent drive engagement, which produces the same symptoms as pump failure: slow lift, erratic operation, and noise. A rubber spider coupling insert (common in some PTO configurations) degrades over time and eventually disintegrates, leaving the pump without a drive connection. This failure mode is frequently overlooked because technicians focus on the pump itself.
For a complete fleet maintenance schedule, see our dump truck hydraulic system maintenance guide.
How to Replace Dump Truck Hydraulic Pump Seals

Seal replacement is the most common dump truck hydraulic pump repair. When the diagnosis confirms shaft seal leakage or internal seal bypass without significant gear or housing damage, replacing the seals restores pump performance at minimal cost.
Identifying the Correct Seal Kit for Your Pump
Seal kits are brand-specific and model-specific. You must match the kit to the exact pump model number stamped on the pump housing. The following table maps common dump truck hydraulic pump brands to their seal kit identification.
| Pump Brand | Common Models | Seal Kit Identification | Typical Kit Cost |
|---|---|---|---|
| Muncie Power | 22-Series, CS-Series, TF-Series | Model number on housing + “SK” suffix | 75–200 |
| Permco | P250, P360, P500 | Series number + displacement | 60–175 |
| Commercial Shearing (CAS) | 3000-Series, 5000-Series | Frame size + seal material code | 80–225 |
| Chelsea (Parker) | 442, 449, 630-Series | Series + revision letter | 90–250 |
| Monarch | M-Series, R-Series | Displacement + shaft type | 50–150 |
Tools Required for Seal Replacement
Gather these tools before beginning the repair:
- Socket set (standard and deep well)
- Torque wrench (inch-pounds and foot-pounds)
- Seal pick or hook tool
- Seal installation mandrel (sized to pump shaft diameter)
- Clean rags and lint-free wipes
- Hydraulic fluid for lubricating new seals
- Safety glasses and nitrile gloves
- Drain the pan for fluid collection
- Clean work surface or bench
Step-by-Step Seal Replacement Procedure
- Drain the pump. Remove the pump from the truck and drain all hydraulic fluid into a clean container. Inspect the drained fluid for metal particles or discoloration.
- Remove the end plate. Remove the bolts securing the end plate (also called the cover plate or back plate). Note the bolt pattern and torque specifications from the pump service manual. Some pumps use dowel pins for alignment.
- Remove the old seals. Use a seal pick to carefully extract the shaft seal, O-rings, and any backup rings from their grooves. Avoid scratching the seal grooves or shaft surface.
- Inspect the shaft. Run a fingernail along the shaft surface where the seal lip rides. If you can feel a groove, the shaft is scored and needs polishing or replacement. A scored shaft will destroy new seals within hours.
- Clean all components. Wipe the seal grooves, shaft surface, and mating surfaces with a lint-free cloth. Remove all old seal material, debris, and fluid residue.
- Install new seals. Lubricate the new seals with clean hydraulic fluid. Use a seal installation mandrel to press the shaft seal evenly into its groove. Ensure the seal lip faces the correct direction (toward the pressurized side). Install O-rings and backup rings in their proper positions.
- Reassemble the end plate. Apply a thin film of hydraulic fluid to the mating surface. Position the end plate and torque the bolts in a star pattern to the manufacturer’s specification.
- Test for leaks. Reinstall the pump, fill with hydraulic fluid, and run at low speed. Check for external leaks at the seal area and end plate before returning to full operation.
Common Mistakes During Seal Installation
The most common mistake is installing the shaft seal with the lip facing the wrong direction. The seal lip must face the pressurized side of the pump. Installing it backwards allows fluid to bypass the seal entirely. The second common mistake is installing seals on a scored shaft. A groove worn into the shaft surface prevents the seal lip from making contact, and the new seal leaks immediately. The third mistake is using sharp tools that nick the seal lip during installation. Even a small nick creates a leak path. Use smooth-edged seal installation tools and lubricate generously.
How to Replace a Dump Truck Hydraulic Pump Coupler
Coupler replacement is a frequently overlooked dump truck hydraulic pump repair. When a pump has been replaced multiple times with the same failure pattern, the coupler shaft should be inspected before installing another pump.
Signs of Coupler Wear and Failure
Coupler wear produces symptoms that mimic pump failure. The dump body may lift slowly, jerk during operation, or fail to lift at all. A distinctive clicking or clunking noise during PTO engagement often indicates worn splines. If you disconnect the pump and inspect the coupler shaft, look for rounded or worn splines, cracks in the rubber spider coupling insert, and play between the coupler and the PTO output shaft.
Coupler Shaft Replacement Procedure
- Disconnect the PTO. Engage the parking brake, chock the wheels, and follow lockout/tagout procedures. Disconnect the PTO electrical or air supply.
- Remove the pump. Disconnect hydraulic lines from the pump, cap open fittings to prevent contamination, and unbolt the pump from its mounting bracket.
- Remove the coupler. Slide the coupler shaft off the PTO output shaft. Some configurations use a setscrew or roll pin to retain the coupler.
- Inspect the PTO output shaft. Check the PTO shaft splines for wear. If the PTO shaft splines are also worn, the PTO unit may need service.
- Install the new coupler. Slide the new coupler shaft onto the PTO output shaft. Ensure full engagement with no play. Replace the rubber spider coupling insert if the configuration uses one.
- Reinstall the pump. Bolt the pump to its mounting bracket and reconnect hydraulic lines. Verify alignment before final tightening.
PTO-to-Pump Alignment Verification
Misalignment between the PTO and pump causes premature coupler wear and pump bearing failure. After installing the coupler and pump, check alignment by rotating the coupler by hand. It should spin freely without binding or tight spots. Use a straightedge across the PTO and pump mounting faces to verify parallel alignment. If the mounting bracket is bent or worn, replace it. For detailed PTO selection and installation guidance, see our dump truck PTO hydraulic pump guide.
Full Gear Pump Rebuild: Step-by-Step

When seal replacement alone cannot restore pump performance because of internal wear, a full gear pump rebuild is necessary. This dump truck hydraulic pump repair procedure addresses worn gears, scored housings, and damaged bearings.
When a Rebuild Is Necessary (Beyond Seal Replacement)
A rebuild is required when pressure testing reveals internal bypass (pressure drops under load), when metal particles appear in the fluid, when the pump produces excessive noise that does not resolve after seal replacement, or when the flow rate has declined more than 10 percent from specification. A rebuild restores internal clearances and surface finish to factory tolerances.
Disassembly Procedure
- Mark the end plate and housing orientation with a punch mark for reassembly reference.
- Remove the end plate bolts in a cross pattern.
- Carefully separate the end plate from the housing. Note any dowel pins.
- Remove the gears and shafts as an assembly. Some pumps have a drive gear and a driven gear; note which is which.
- Remove the bearings or bushings from the housing and end plate.
- Clean all components in solvent and dry with compressed air.
Shaft Wear Inspection and Measurement
Measure the shaft diameter at three points using a micrometer: near the seal journal, at the center, and near the gear. Compare measurements to the manufacturer’s specifications. The following table provides general tolerance guidelines.
| Measurement Point | Maximum Acceptable Wear | Action if Exceeded |
|---|---|---|
| Shaft seal journal | 0.001 inches (0.025 mm) | Polish or replace shaft |
| Shaft center section | 0.002 inches (0.050 mm) | Replace shaft |
| Gear bore to shaft fit | 0.0015 inches (0.038 mm) | Replace shaft and gear |
| Housing bore to gear OD | 0.002 inches (0.050 mm) | Replace housing or gear |
A shaft with a visible groove at the seal journal must be polished or replaced. Installing new seals on a grooved shaft is the single most common cause of premature seal failure.
Gear Tooth and Housing Bore Inspection
Inspect gear teeth for pitting, chipping, or uneven wear patterns. Minor polishing on gear teeth is acceptable, but visible pitting or material loss requires gear replacement. Check the housing bore for scoring by running a finger along the bore surface. Scoring creates a leak path between the gear tips and the housing, reducing volumetric efficiency. Minor scoring can sometimes be polished out; deep scoring requires housing replacement.
End Plate Flatness Check
Place a straightedge across the end plate mating surface and check for gaps with a feeler gauge. Maximum allowable warpage is typically 0.001 inches (0.025 mm). A warped end plate allows fluid to bypass the gear chamber, reducing pressure and flow. Minor warpage can be lapped flat on a surface plate with fine lapping compound.
Reassembly with New Seals and Torque Specifications
Install new bearings or bushings in the housing and end plate. Lubricate all internal components with clean hydraulic fluid before assembly. Insert the drive gear and driven gear into the housing, ensuring proper mesh orientation (timing marks if applicable). Install new seals, O-rings, and gaskets. Place the end plate and torque bolts in a star pattern to the manufacturer’s specification, typically 15-25 foot-pounds for most dump truck gear pumps.
Post-Rebuild Pressure and Leak Testing
Reinstall the pump on the truck. Fill the reservoir with clean hydraulic fluid. Run the pump at low idle for two minutes while checking for leaks. Gradually increase to operating speed and test pressure at the pump outlet. Compare to the pump’s rated specification. Cycle the dump body through a full lift-and-lower cycle while monitoring pressure stability. A properly rebuilt pump should hold relief pressure without fluctuation.
Repair vs. Replace: Cost Decision Framework
The decision to repair or replace a dump truck hydraulic pump depends on the extent of damage, the cost of parts, and the value of the truck. The following tables provide a structured framework.
DIY Seal Kit Replacement Costs
| Item | Cost Range |
|---|---|
| OEM seal kit | 50–250 |
| Shop supplies (solvent, rags, fluid) | 20–50 |
| Total parts cost | 70–300 |
| Labor (3-4 hours, DIY) | $0 |
| Total DIY cost | 70–300 |
Professional Shop Rebuild Costs
| Item | Cost Range |
|---|---|
| Seal kit and gaskets | 75–250 |
| Bearings and bushings (if needed) | 50–150 |
| Labor (4-8 hours at 85−150/hr) | 340–1,200 |
| Total shop rebuild cost | 465–1,600 |
New and Remanufactured Pump Costs
| Option | Cost Range | Warranty |
|---|---|---|
| Aftermarket new pump | 600–1,800 | 6-12 months |
| OEM new pump | 1,200–3,500 |
12-24 months |
| Remanufactured pump | 500–1,500 | 6-12 months |
Decision Matrix: When to Repair, When to Replace
| Condition | Repair Cost | New Pump Cost | Repair as % of New | Recommendation |
|---|---|---|---|---|
| Shaft seal leak only | 70–300 | 800–2,000 | 9% – 15% | Repair |
| Worn gears, good housing | 465–800 | 800–2,000 | 58% – 40% | Repair |
| Scored housing + worn gears | 800–1,600 | 800–2,000 | 100% – 80% | Replace |
| Cracked housing | Not repairable | 800–2,000 | N/A | Replace |
| Obsolete model, hard-to-find parts | Varies | 800–2,000 | Varies | Replace |
| Third rebuild on same pump | 465–1,600 | 800–2,000 | 58% – 80% | Replace |
Total Cost of Ownership Considerations
Repair cost alone does not tell the full story. Factor in downtime cost (a dump truck not earning revenue), risk of re-failure, remaining lifespan after repair, and the age of the truck. For a truck with 500,000+ miles and structural issues, investing in a full pump rebuild may not make economic sense. For a truck with 200,000 miles and a solid chassis, a quality rebuild extends the truck’s productive life at a fraction of replacement cost.
Safety Protocols for Hydraulic Pump Repair

Hydraulic systems operate at pressures that can cause severe injury or death. Every dump truck hydraulic pump repair must follow strict safety protocols.
Lockout/Tagout (LOTO) Procedures
Before starting any hydraulic pump repair:
- Shut off the engine and remove the key.
- Engage the parking brake and chock the wheels.
- Relieve all hydraulic pressure by cycling the control valve through all positions with the engine off.
- Disconnect the PTO electrical or air supply to prevent accidental engagement.
- Place a lock and tag on the PTO switch or valve control.
- Verify zero energy state by attempting to operate the dump body controls.
Pressure Relief and Fluid Containment
Hydraulic fluid under pressure can penetrate the skin and cause serious infection. Before disconnecting any hydraulic line, relieve system pressure completely. Use a rag or cardboard shield around fittings when loosening to catch residual fluid spray. Have a drain pan positioned under the work area. Never use your hand to check for leaks under pressure; use a piece of cardboard or paper instead.
Personal Protective Equipment (PPE)
Wear safety glasses at all times during hydraulic pump repair. Use nitrile gloves to protect against hydraulic fluid exposure, which can cause skin irritation and chemical burns. Wear steel-toed boots when handling pump assemblies, which weigh 20-50 pounds depending on size. Use hearing protection when running the system for testing.
Safe Handling of Hydraulic Fluid
Hydraulic fluid is toxic if ingested and harmful if absorbed through the skin. Store used fluid in clearly labeled containers for proper disposal. Clean up spills immediately with absorbent material. Never use compressed air to blow out hydraulic lines, as this creates a dangerous mist of atomized fluid. Dispose of used fluid according to local environmental regulations.
For a full diagnostic workflow, see our dump truck hydraulic pump troubleshooting guide.
Frequently Asked Questions
Why is my dump truck hydraulic pump not building pressure?
A dump truck hydraulic pump that fails to build pressure usually has internal wear (worn gears or scored housing), a sheared coupler shaft that prevents the pump from turning, a stuck-open relief valve bypassing flow to the reservoir, or air in the system from a suction-side leak. Check the coupler first, then test pressure at the pump outlet with a gauge.
How much does it cost to rebuild a hydraulic pump on a dump truck?
A DIY seal kit replacement costs 70 to 300 in parts. A professional shop rebuild with new seals, bearings, and labor costs 465 to 1,600. A new replacement pump costs 600 to 3,500, depending on brand and specifications. Repair is typically 40 to 60 percent cheaper than replacement.
Can you rebuild a dump truck hydraulic gear pump yourself?
Yes, if you have mechanical experience, proper tools, and a clean work environment. A seal replacement requires basic hand tools and 3-4 hours. A full rebuild requires a micrometer, a torque wrench, and the ability to measure tolerances. If you lack measuring equipment or experience, have a hydraulic shop perform the rebuild.
What causes a hydraulic pump to fail on a dump truck?
The most common causes are contaminated fluid (70 percent of failures), cavitation from air ingress, overheating from low fluid or restricted flow, coupler shaft wear, and operating the pump above its rated speed due to incorrect PTO ratio selection.
Conclusion
Effective dump truck hydraulic pump repair starts with diagnosis, not replacement. The diagnostic process described in this guide, from fluid inspection through pressure testing and component isolation, prevents the most expensive mistake in hydraulic maintenance: replacing a pump when the problem lies elsewhere in the system.
When the pump does need repair, the decision framework helps you choose between a seal replacement, a full rebuild, or a new pump based on the extent and cost. A 150 seal kit solves most shaft seals. A $465 to $1,600 rebuild addresses worn gears and bearings. A new pump makes sense only when the housing is damaged or repair costs approach replacement costs.
Need replacement pumps, seal kits, or engineering consultation? Contact LOYAL INDUSTRIAL for factory-direct hydraulic components, compatibility verification, and technical support for your dump truck fleet.