Packing is supposed to leak. That single fact explains why so many plunger pump packing replacements fail before the pump returns to service.
Daniel, a maintenance engineer at a reverse-osmosis plant, learned it the expensive way. His triplex pump had run about 5,800 hours when the stuffing box began streaming. The gland was already bottomed out, so he ordered a plunger pump packing kit and repacked all three cylinders.
Three hundred hours later, the leak was back. The plunger had a ring of scoring that cut the new packing from the inside. The second repair included three ceramic plungers, and the leak stayed controlled for the rest of the campaign.
If you maintain process plunger pumps, you already know packing is a wear item. What’s harder to find is a neutral procedure that covers the decision, the installation, the gland setting, and the commercial side. This guide gives you all four. The same steps apply to triplex plunger pump packing replacement and to multiplex pumps used in pressure washing, reverse osmosis, waterjet, chemical dosing, and well service.
The operators in the scenarios below are representative composites drawn from common service patterns, not named customer accounts. The procedures assume a packed stuffing box. For the wider machine, see the complete plunger pump guide.
Not sure whether you need packing, a plunger, or a rebuild? Send the pump model, duty point, photos, and leak history to our engineers for a packing and seal kit recommendation. Contact for industrial solution consultation.
Plunger Pump Packing Leaking? Adjust, Repack, or Replace
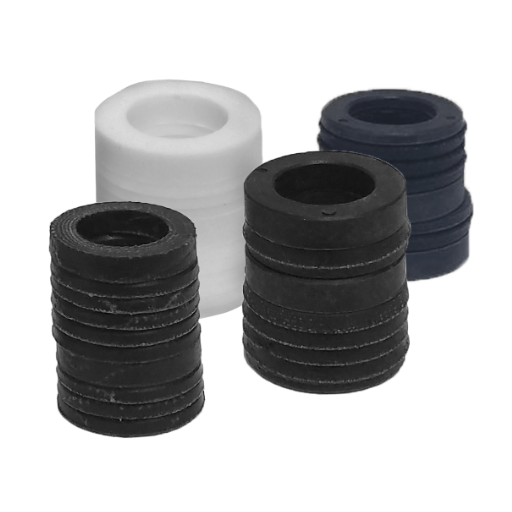
Plunger pump packing replacement is the second option, not the first. Work through the decision in order. You’ll avoid unnecessary teardowns and catch the failures that new packing cannot fix.
| Condition | First action | Why |
|---|---|---|
| Gland has travel, and the leak responds to a small adjustment | Adjust and monitor | Packing may still have service life |
| Gland is bottomed out, or the leak returns within hours | Repack | Compression reserve is gone |
| Plunger is scored, pitted, cracked, or out of tolerance | Replace plunger and packing together | A rough plunger cuts new packing |
| Stuffing-box bore is washed out, or trim is worn | Repair or replace trim | New rings cannot seal against a damaged bore |
| Manifold is cracked or pitted, bearings are worn, or repair exceeds about 60–70% of a new pump | Rebuild or replace the pump | Wear parts are no longer the only issue |
Plunger pump packing adjustment is covered in the plunger pump maintenance schedule. This article covers the replacement procedure. If you are still diagnosing the symptom, start with the plunger pump troubleshooting guide.
What Controlled Leakage Looks Like
As an overview, a packed gland must weep slightly to lubricate and cool the packing. A leak-free stuffing box is not the goal. Over-tightening raises friction, glazes the packing, and wears the plunger.
Published leak rates vary because pump type, packing style, pressure, and fluid all change the target. General packed-pump guidance ranges from roughly 10 to 120 drops per minute. Some plunger-pump sources treat a steady leak above 3 to 5 drops per minute as a replacement trigger. Those numbers are starting points, not a universal specification.
The OEM manual governs.
Replace-Now Triggers
Repack when one or more of these conditions is present:
- The gland nut is bottomed out, and no adjustment remains.
- Leakage returns within hours of tightening.
- The stuffing box runs hot, or the packing smells scorched.
- The plunger shows scoring, pitting, cracks, or a dull wear band.
- The bore is washed out, grooved, or pitted.
- Packing life is consistently shorter than the service interval.
If the pump has a history of short packing life, don’t simply install another set. Find the cause first. The usual suspects are a worn plunger, a damaged bore, misalignment, dry running, suction starvation, or the wrong packing material.
Identify Your Packing Style Before Ordering Parts
Plunger pump packing is not one product. The gland arrangement determines how you install and tension the rings. Confirm the style before you order a kit.
Adjustable Compression Packing
This is the classic stuffing box. A gland nut or follower compresses square-braided or die-formed rings against the plunger. It requires periodic adjustment and produces controlled leakage. Most industrial triplex pumps and many pressure-washer pumps use this style.
Spring-Loaded and Non-Adjustable Packing
Some pumps use a spring to maintain packing load. The gland is seated fully against the box face, and there is no further field adjustment. Correct ring length matters because the spring provides the compression. Don’t back off a spring-loaded gland unless the OEM instructs you to.
V-Ring, Chevron, and Cartridge Sets
V-ring or chevron packing is automatic and self-sealing. Pressure expands the lips against the plunger and bore. It’s common in well-service and metering pumps. Cartridge sets replace the whole packing stack as a unit.
| Style | Adjustment | Typical service | Installation caution |
|---|---|---|---|
| Adjustable compression | Periodic gland adjustment | General industrial, pressure washing | Ring order, joint stagger, controlled leak |
| Spring-loaded / non-adjustable | Seat fully; no field adjustment | Compact and OEM-specific pumps | Correct ring length and spring tension |
| V-ring / chevron | Usually finger-tight | Well service, metering, high pressure | Stack order and lip orientation are critical |
| Cartridge | Replace as a unit | Modern modular pumps | Match the cartridge part number exactly |
Do not substitute automatic V-ring packing for compression packing, or the reverse, without OEM approval. The stack heights and load paths are different. The triplex vs quintuplex plunger pump comparison explains why multiplex pumps carry multiple packing sets and why the count drives ownership cost.
Tools, Kit Contents, and Safety
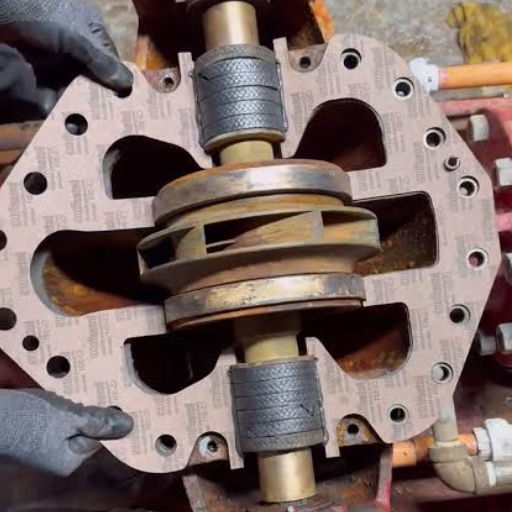
Packing work happens at the fluid end, where stored pressure and high-pressure fluid are present. Safety is part of the procedure, not a disclaimer at the end.
Before you open anything:
- Stop the drive, apply lockout/tagout, and confirm zero energy. OSHA’s lockout/tagout standard is the baseline.
- Relieve discharge and suction pressure. Trapped pressure can remain behind a check valve.
- Drain and flush with a compatible fluid. Isolate chemical feed.
- Wear chemical-resistant gloves, eye and face protection, and site-required PPE.
- Treat every pinhole leak as a high-pressure injection hazard. Do not probe with your fingers. An injection injury needs immediate medical attention.
Typical kit contents:
- High-pressure packing rings
- Low-pressure or wiper seals
- Head rings and retainers
- O-rings and backup rings
- Lantern ring or adapters in complete sets
- Valve components in a full rebuild kit
Replace every O-ring and secondary seal disturbed during the job. Replace the slinger washer and plunger O-ring whenever a plunger is removed. Reusing old elastomers with new packing is a common cause of repeat failure.
Tools to have ready: seal puller or pick, model-specific extractor collet, soft mallet, packing insertion tool, torque wrench, clean lint-free cloths, compatible lubricant, and a parts tray for stack order.
Need the right kit the first time? Send the pump nameplate, plunger diameter, and packing style. We will confirm the kit contents before you order. Request technical specification sheet.
Step-by-Step Plunger Pump Packing Replacement
The sequence below is general. Stack order, torque, and clearances are model-specific. Follow the OEM manual for your pump.
Step 1: Isolate, Depressurize, and Drain
Stop the pump, lock out the drive, and isolate suction and discharge. Relieve pressure and drain the fluid end. Flush if the fluid is hazardous, abrasive, or prone to crystallizing. Confirm zero pressure at a gauge you trust before removing a fastener.
Step 2: Open the Fluid End or Stuffing Box
On manifold-style pumps, loosen the head or manifold bolts evenly in a cross pattern and separate the head. On stuffing-box designs, withdraw the box, plunger, and packing together where the OEM allows. Some models let you change packing without removing the head or pipeline. Never pry against a ceramic plunger.
Step 3: Remove the Old Packing and Trim
Remove every old ring. Do not add new packing on top of compressed rings. Note the order and orientation of the stack before it comes apart.
Remove the lantern ring, adapters, pressure rings, and wiper. Use the correct extractor and do not scratch the bore.
Step 4: Clean and Inspect the Bore and Plunger
Clean all packing cavities and remove scale, corrosion, and rubber residue. Then inspect:
- Stuffing-box bore: smooth and cylindrical, not washed out, grooved, or pitted.
- Plunger: no cracks, chips, scoring, pitting, or corrosion. Ceramic plungers are brittle.
- Trim: throat bushing, lantern ring, adapters, follower, and gland ring.
- Clearance: new plunger-to-ring clearance is typically about 0.005–0.007 in. Replace parts when clearance exceeds the OEM limit, commonly cited as 0.005 in.
- Concentricity: the plunger should run centered in the bore. Misalignment causes one-sided wear.
Never install new packing on a worn plunger. The rough surface acts like a cutting tool.
Step 5: Install the New Packing in the Correct Order
Lubricate the packing and plunger with the lubricant specified by the OEM. Install one ring at a time and seat each ring fully against its shoulder.
Stagger ring joints, commonly 90° to 120° and sometimes 180° for split rings. Align the lantern ring with the flush or lubrication port. Sealing lips generally face the pressure side, but V-ring direction varies by design.
Don’t tap, drive, or deform the rings. Use an insertion tool or a soft drift. A damaged lip will leak from the first stroke.
Step 6: Set the Gland and Initial Compression
Packing gland adjustment starts with a simple mark-and-back-off method:
- With the plunger removed, tighten the gland hand-tight plus about one-quarter turn to seat the packing.
- Mark the gland and the stuffing box.
- Back the gland off three-quarters to seven-eighths of a turn.
- Oil the plunger and push it in by hand.
- Tighten the gland until the marks realign, so the back-off remains visible.
Target axial packing compression is commonly cited as 0.025–0.040 in (0.64–1.0 mm). Spring-loaded packing is seated fully. V-ring packing is usually finger-tight.
Never use a cheater bar. The OEM manual governs the final setting.
Step 7: Reinstall the Plunger
Oil the plunger and insert it carefully by hand or with a soft mallet. Never hammer or pry a ceramic or coated plunger. Replace the plunger washer, O-ring, and cushion washer when the OEM specifies it. Confirm the plunger moves freely through the new packing.
Step 8: Reassemble and Torque to Specification
Reassemble in reverse order with new gaskets and O-rings. Tighten fasteners in a cross pattern to the OEM torque. Representative examples show why you must verify:
- Myers/Aplex SC-65L: fluid-end cap screws 7/8″-9UNC at 250 ft-lb; stuffing-box screws 3/4″-10UNC at 160 ft-lb; retighten after about 500 hours.
- AR/Vortexx SJ and XJ series: head bolts to about 443 in-lb (37 ft-lb).
- Generic guides often cite manifold bolts at 18–22 ft-lb. That’s not a universal value.
Use anti-seize on stainless threads where specified.
Step 9: Run In, Recheck, and Record
Start at low speed and low pressure if the drive allows. Expect initial weeping. Adjust the gland in small increments, commonly one-sixth to one-half turn or one flat, and only while running if the OEM permits. Some procedures double the lubrication rate for the first 24 hours.
Run for two to three hours and watch leakage and stuffing-box temperature. Some packing needs one to two days to seat.
Recheck after 24 to 48 hours. Record the date, operating hours, kit part number, packing material, ring count, gland turns, final leak rate, and plunger condition. That record turns the next plunger pump packing replacement from guesswork into planning.
Choosing Packing Material: PTFE, Aramid/Kevlar, HNBR, FKM, PEEK
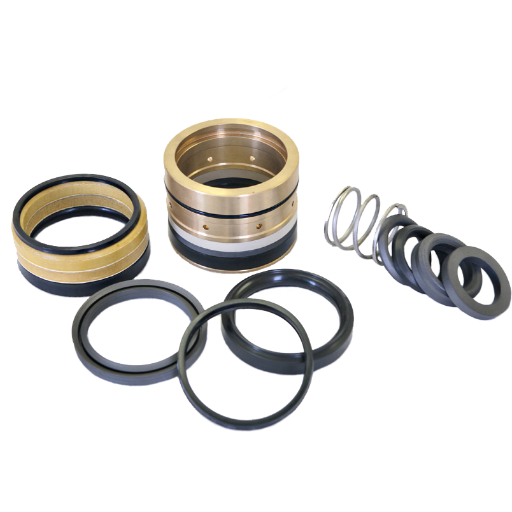
Plunger pump packing material selection decides whether the packing survives the fluid. Match chemistry first, then abrasion, pressure, temperature, and duty cycle.
| Material | Best for | Limits and notes |
|---|---|---|
| PTFE | Chemical resistance, clean water, low friction | Extrusion and compression set at high pressure; some dosing-pump guidance limits standard PTFE to about 40 bar |
| Aramid/Kevlar | Abrasion resistance and high pressure | Not for concentrated acids or alkalis; often paired with brass rings in multiplex pumps |
| HNBR | Abrasion, oil, and moderate chemical duty | Confirm temperature and specific fluid compatibility |
| FKM/Viton | Acids and aggressive chemicals | Confirm hot-water and steam limits; not universally chemical-proof |
| PEEK | High-pressure backup rings and adapters | Usually a support component, not the primary packing in every design |
| NBR | General water and oil service | Low cost; limited chemical and temperature range |
Aisha, a maintenance planner at a chemical dosing site, standardized on aramid packing because it had performed well on abrasive slurry duty. On a 15% sodium hypochlorite line, the rings degraded, and the leak returned within 400 hours. The OEM compatibility chart called for PTFE with a PEEK backup ring. The switch held for the rest of the campaign, but two plungers had already been scored by the failed packing.
Use a lantern ring and flush for dirty, abrasive, or below-atmospheric stuffing-box service. If the fluid contains sand, silt, or process solids, filtration and flush often matter more than the packing brand.
Common Mistakes That Shorten Packing Life
Most repeat failures after a plunger pump packing replacement trace to installation or inspection, not the packing itself.
- Over-tightening the gland to stop all leakage.
- Installing new packing on a scored or worn plunger.
- Adding rings on top of old packing.
- Installing rings dry or with an incompatible lubricant.
- Getting the stack order, lip orientation, or joint stagger wrong.
- Mixing old and new elastomers.
- Reusing worn trim, adapters, or a damaged lantern ring.
- Ignoring misalignment or poor concentricity.
- Running dry or starving suction.
- Choosing a material that cannot handle the chemistry or abrasion.
- Continuing to tighten a packing that has already bottomed out.
A leak-free gland is not a successful repair. A controlled weep, stable pressure, and normal temperature are the signs of a correct installation.
Plunger Pump Packing Replacement Cost, Kits, and Repair-vs-Replace
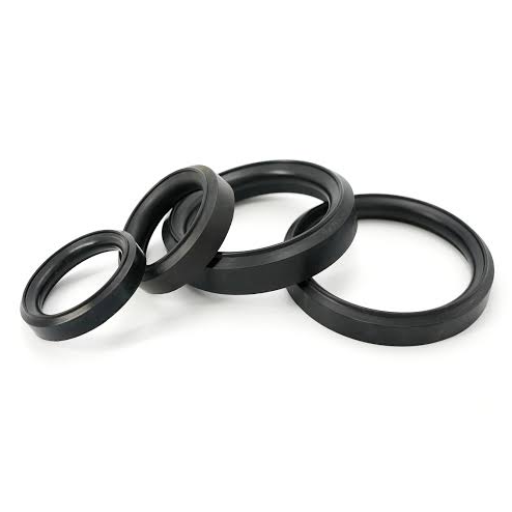
Plunger pump packing replacement is a consumable-driven job, so the commercial decision matters as much as the procedure.
Kit contents and price benchmarks. Basic pressure-washer plunger pump packing kits commonly run about $76–$173. Larger industrial rebuild kits run roughly $357–$404. Specialized metering-pump kits can reach about $1,499, and bulk well-service packing starts around $60 per piece at a five-piece minimum. Prices move with brand, plunger size, and kit scope, so treat these as planning ranges.
OEM versus aftermarket. Verify the pump model and serial number, plunger diameter, packing style, material, and kit contents. A kit that looks similar can have the wrong cross-section or ring count. Ask for traceability and confirm that the supplier supports the consumable long term. If you are sourcing at volume, plunger pump manufacturers and suppliers can explain how to evaluate production capability and quality control.
Marco, a reliability engineer at a well-service company, logged every repack for two years: serial number, plunger diameter, kit part number, gland turns, and hours to failure. The records showed one pump family failing at roughly half the fleet average. A suction-line change fixed the pattern. His emergency kit orders fell from 14 a year to three.
Repair versus replace. Rebuild when the manifold, crankcase, and drive are sound and only wear parts failed. Replace the head or pump when the manifold is cracked, pitted, or thread-damaged. The same applies when the crankcase is cracked, bearings are badly worn, or the repair quote approaches 60–70% of a new unit. A pump that loses pressure but has no external leak may need valves as well as packing. Replace valves with the packing when the hours justify it.
Building a spares strategy? We can help you standardize packing kits and consumables across a mixed pump fleet. Get a customized hydraulic system recommendation.
Frequently Asked Questions
How often should plunger pump packing be replaced?
There is no universal interval. Clean-water service commonly runs about 500–800 hours, with some sources citing up to 2,000 hours. Abrasive service can drop to 200–300 hours.
Fracturing service may need inspection every 25–50 hours and replacement every 50–150 pumping hours. Cementing and acidizing fall in between. Inspect every 50 hours and follow the OEM manual.
How tight should a plunger pump packing gland be?
For adjustable packing, a common starting point is hand-tight plus one-quarter turn to seat, then back off three-quarters to seven-eighths of a turn before installing the plunger. Final axial compression is typically 0.025–0.040 in. Spring-loaded packing is seated fully. V-ring packing is usually finger-tight.
How much should plunger pump packing leak?
A small continuous weep is normal. Published guidance ranges from about 10 to 120 drops per minute for general packed pumps. Some plunger-pump sources treat more than 3–5 drops per minute as a replacement trigger. The difference reflects pump type and packing style. Follow the OEM manual and never tighten to zero leakage.
Can I replace packing without removing the pump?
Often yes. Many manifold-style pumps allow the head or stuffing box to be serviced in place. Confirm access, lifting, lockout, and pipe isolation before you start.
Why is my plunger pump packing leaking right after replacement?
Common causes include a damaged lip during installation, dry start-up, wrong ring orientation or order, a worn plunger, a washed-out bore, insufficient run-in, or a gland that is too loose.
Do I need to replace the plunger when I repack?
If it is scored, pitted, cracked, or out of tolerance, yes. New packing on a worn plunger fails early. If the plunger is smooth and within specification, it can be reused after inspection.
What is the difference between packing and a seal?
Packing is compression packing in a stuffing box with controlled leakage. “Seal” can mean the low-pressure wiper or secondary seal, O-rings, or a self-adjusting seal set. If the job also renews the wiper, O-rings, and secondary seals, treat it as a plunger pump seal replacement. Rotary hydraulic seal kits are a different family.
Can I mix packing materials or brands?
No. Use a complete matched set. Mixing materials can create uneven load, different wear rates, and chemical incompatibility.
Is packing replacement a DIY job?
It is a field-service task for trained maintenance personnel. Stored pressure, high-pressure injection, ceramic plunger handling, and model-specific torque make the OEM procedure and PPE mandatory.
Conclusion
Plunger pump packing replacement is a controlled engineering task, not a race to stop a drip. Decide first whether the pump needs adjustment, repacking, a new plunger, or a rebuild.
Identify the packing style before ordering parts. Inspect the bore and plunger before installing anything. Seat each ring, set the gland to the OEM method, run in slowly, and record what you found.
Three lessons matter most. Controlled leakage is normal. Over-tightening causes as many failures as worn packing.
And a scored plunger will destroy a new packing set every time. The plunger pump maintenance schedule and troubleshooting guide cover the program and diagnosis around this procedure.
If you need help matching a kit to a specific pump, or want a second opinion before a rebuild, talk to our team. Contact us for industrial solution consultation with the pump model, duty point, and photos.