Various industrial applications rely on hydraulic pumps, key components that help in efficient fluid movement and power transmission. This troubleshooting guide is meant to give KTI hydraulic pump users maintenance tips they need to know as well as systematic ways of identifying and resolving common problems. If pump operators understand the inner workings of these pumps properly and apply appropriate maintenance measures, they can extend their lifespan while enhancing performance. The purpose of this essay is to provide readers with the necessary information required for diagnosing issues professionally, applying preventive measures effectively, and maximizing hydraulic pump operations, thus reducing downtimes together with expenses on maintaining them.
What Are the Key Components of KTI Hydraulic Pumps?
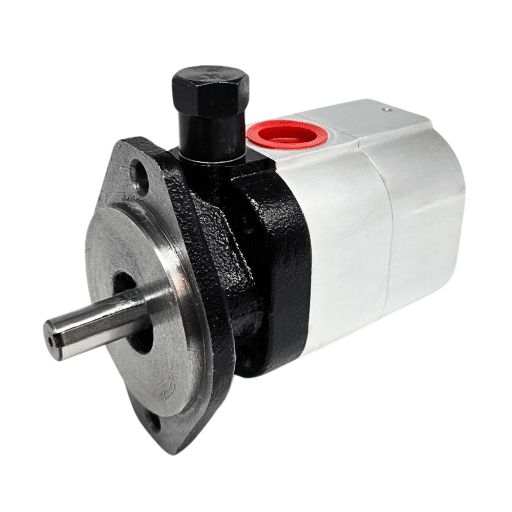
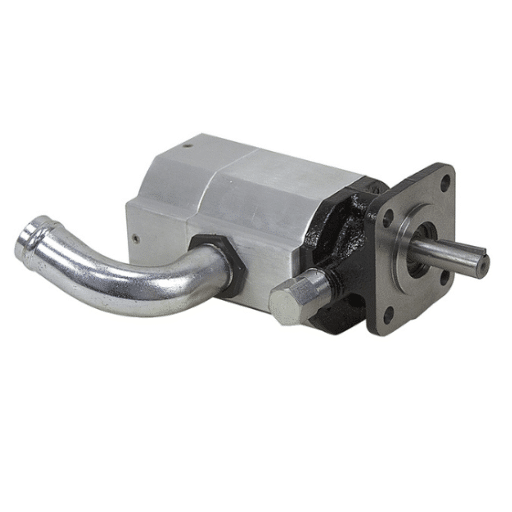
Several components of KTI hydraulic pumps together make fluid movement and power transmission effective. The main components include a pump housing that holds the internal mechanisms, and rotors or gears for creating the required pressure to flow hydraulic fluid. An input shaft also helps in connecting the pump to the power source to make it rotate. Moreover, suction and discharge ports allow for fluid intake and expulsion which maintains continuous flow within the system. Lastly, seals and bearings have an important role in keeping pressure integrity and reducing friction, hence contributing to the overall efficiency and reliability of the pump system. It is important to understand these parts for effective maintenance as well as troubleshooting.
Typical Applications of KTI Hydraulic Pumps
Construction Equipment: Excavators, backhoes, cranes, etc., use KTI hydraulic pumps frequently. They provide sufficient energy through hydraulics thereby ensuring precise control of various attachments with efficient handling processes.
Agricultural Machinery: These are found in tractors and harvesters, among other agricultural equipment. They enhance farming productivity by performing critical tasks like implementing operations as well as steering mechanisms.
Material Handling Systems: In warehousing and distribution centers, pallet jacks, forklifts, or conveyor systems fitted with KTI hydraulic pumps enable lifting services for heavy goods, thus facilitating operations while maintaining safety standards.
Mobile Equipment: Aerial lifts and road construction vehicles, among others, have KTI hydraulic pumps incorporated into them, hence their high dependability even in all operational environments where there are worker safety concerns and task completion needs.
Industrial Machinery: All kinds of machines, such as presses and injection molding machines, require fluid power, which comes from using KTI hydraulic pumps according to their industrial applications. This ensures smooth running, resulting in improved production rates.
Marine Applications: Vessels operate with winches, steering systems or other hydraulic systems with KTI hydraulic pumps. Therefore, one can be sure that they will operate in a safe mode.
Automotive Systems: These are also used in vehicles, particularly for hydraulic brakes and steering. They ensure safety and control when the car is being driven.
The Importance of Regular Maintenance
Regular maintenance of hydraulic pumps is important for several reasons but mainly to achieve optimal performance and longevity of the equipment. Firstly, continuous checks and servicing ensure no dirt or debris pile up; hence, there is no wear and tear, which may eventually lead to the failure of key components. Secondly, preventive maintenance detects potential problems prior to becoming expensive repairs or downtimes, thereby increasing overall productivity. Also, regular lubrication, as well as fluid checks, are essential for maintaining high-efficiency levels while minimizing energy usage. Finally, following maintenance schedules helps one comply with safety regulations that protect both the machinery involved and the personnel operating it. This proactive approach results into long service life of a pump, low expenses related tc ownership thereof on an annual basis only
How to Identify Symptoms of Hydraulic Pump Issues?
Knowing the symptoms of hydraulic pump problems is crucial to ensure maximum efficiency. Unusual sounds such as grinding or whining indicate internal friction and are associated with wear or lack of enough grease. Furthermore, changes in the pressure reading indicate possible obstructions or leaks in the system that could lead to inefficiency. Another symptom to be observed for is overheating caused either by sticky fluid or undue loading which ruins components quickly. Lastly, one could notice a decrease in system performance like slow actuator response or reduced lifting ability which may suggest there are issues within the hydraulics. Regularly checking these signs helps prevent expensive malfunctions since they can be repaired in a timely manner.
Unusual Noises And Vibrations
When unusual noises and vibrations occur around hydraulic pumps, it means that something else is wrong and must be fixed before it’s too late. Typically, grinding sounds signify damaged parts inside the pump due to poor lubrication or dirty oil. One has to take into consideration such technical parameters as viscosity which should correspond with manufacturer’s prescription for better lubrication characteristics as well as performance level.
The whining sound shows cavitation, which is the formation and collapse of vapor bubbles due to decreased compression areas in the system. To reduce this problem, inlet pressure has to be maintained above the minimum indicated by specifications.
Vibrations from a misaligned pump assembly or an unbalanced one might sometimes happen. To correct this situation – apply angular alignment using precision measuring devices ensuring they are within tolerable limits specified by technical documentation both axially and angularly. These parameters can help identify the root cause while also allowing for timely repairs ultimately caring for its integrity and efficiency.
Reduced Pump Performance Indicators
Decreased pump performance symptoms can manifest themselves differently, and they constitute vital indicators showing possible faults within hydraulic systems. One common symptom is lower discharge pressure resulting from worn-out seals and valves, among other components that necessitate fluid bypassing through them. Moreover, increased amperage draw may indicate that the pump is struggling to deliver its output and is facing internal resistance or blockages.
Another sign worth mentioning here is an obvious decrease in flow rate implying some possible problems such as clogged filters or piping restrictions. Temperature variations that go beyond the manufacturer’s permissible limits can also show overheating or poor fluid circulation which leads to further degeneration of system components. Through these performance measures, inefficiencies are detected early enough so that they could be attended to through maintenance activities to ensure sustained reliability during its application thus preventing catastrophic failures.
How To Detect Hydraulic Fluid Leaks
It is important to identify hydraulic fluid leaks for optimal system performance. A complete visual inspection of all hydraulic system components should start with connection points, hoses, seals, and fittings being checked for any signs of leakage since these areas are typically affected by leaks. If there is evidence of hydraulic oil stains or puddles beneath equipment, it means there has been a slow leak over time.
Dye testing utilization can enable improved detection capabilities. When a fluorescent dye is injected into hydraulic fluid, any leak will appear bright on ultraviolet light making it easily recognizable in dark or inaccessible areas. A pressure test could also identify leaks by monitoring changes in system pressure over time; a fall in pressure indicates a breach within the system.
Regular maintenance and cleanliness should not be ignored. Cleaning the hydraulic system and its vicinity at regular intervals helps avoid fluid build-up and quickly spot new leaks. Also, put absorbent materials around possible leaking points that will capture escaping fluids, thus indicating an immediate need for inspection. These practices help detect and manage hydraulic fluid leaks early, thus retaining the system’s efficiency while keeping it safe.
How Do You Diagnose Hydraulic Pump Problems?
Diagnosing hydraulic pump problems requires a step-by-step approach to recognizing the signs and appraising its effectiveness. To begin with, it’s important to monitor the system’s behavior, such as any unusual sounds and fluctuating pressure, which can indicate that there may be some problem with the pump. In this case, diagnostic tools like an infrared thermometer, flow meters, or pressure gauges can be very useful.
It is also necessary to check if there is enough hydraulic fluid and whether it is contaminated or not as these factors greatly affect the performance of the pump. One should also observe for any leakages at seals, joints and excessive heat on a pump that are signs of wear. Flow and pressure output needs to be measured during a performance test against manufacturer specifications in order to determine if there are any issues. If you notice cavitation on a pump characterized by hissing or knocking sound, try checking if there are blockages or air leaks in suction line. Lastly, motor analysis can help determine whether the driving motor is functioning correctly, as motor problems affect the efficiency of hydraulic pumps. Thus, preventive monitoring and maintenance can keep hydraulic systems working for longer.
Methods for Visual Inspection
External Examination: Inspect all parts of the pump from the outside for deterioration marks on their surfaces, such as hoses and seal fittings, using your eyesight only; see, for example, corrosion spots or leakages.
Surface Temperature Checks: Watch how different sections work when turning on this machine while using other things to control temperatures; thus you may detect overheating points through thermal imaging cameras.
Fluid Level and Condition Assessment: First, if you carefully look at liquid reservoirs, they should have proper heights without changing coloration, which indicates unwanted particle presence within them, causing their malfunctioning during operation.
Vibration Analysis: Use hand-held devices to detect vibrations that are out of the ordinary during operations. Regular deviations could imply bad alignment or wear somewhere along the internal structure.
Sound Evaluation: While the machine is on, listen for any odious noise, such as grinding, knocking, or a strange hum, that may be a sign of internal problems.
Using Diagnostic Tools Effectively
Precision and proper technique are needed with diagnostic tools used in hydraulic pump maintenance to achieve accurate results. First, ensure all equipment is calibrated according to the manufacturer’s specifications so as to maintain the integrity of measurements. Use diagnostic software that interfaces with the pump’s control systems allowing real-time data feeds and prediction analytics for failure risks. Use devices such as pressure gauges, flow meters and digital multimeters to determine operational parameters efficiently.
Take note of all readings and analyses conducted throughout this exercise. This will help identify trends and allow for comparison purposes in future studies. Carry out diagnostics at different stages of operation: start-up, maximum load conditions, and the end period when you can have a complete set of data gathered. Finally, discuss with maintenance personnel what has been discovered from diagnostic tests conducted before acting on this information, as it was collected as part of a repair or adjustment process.
Signs of Wear and Tear in Hydraulic Pumps
It is essential to identify the signs of wear and tear in hydraulic pumps to ensure that operational efficiency is maintained, and unexpected failures are avoided. Common indicators include fluid leaks, which may suggest deterioration of seals, and changes in pressure readings, which may point to internal blockages or component wear. Additionally, monitoring the temperature of the hydraulic fluid is crucial; overheating can signal excessive friction or inefficiencies within the pump system. Unusual vibrations or increased noise levels during operation are critical warning signs that should not be ignored since they may indicate misalignment, imbalance, or internal damage. Regular inspections and analysis of these symptoms help ensure timely maintenance measures that elongate the life span of the hydraulic pump and guarantee uninterrupted services.”
What Are Common Hydraulic Pump Failures and Their Causes?
The causes of hydraulic pump failures can be seen in several common forms. The most common is cavitation, which occurs when bubbles of vapor are formed in the hydraulic fluid and violently collapse, causing significant internal damage. This often happens due to insufficient fluid supply or excessive pump speed. Another common problem is leakage, resulting from worn-out seals or improper installation that leads to a loss in fluids and decreased efficiency. Another one is an overheated condition that results in failure of some parts; such a condition usually arises because of contamination within the fluid, high pressure exerted into it or no adequate cooling system. Finally, mechanical failures such as bearing wear or shaft misalignment could also cause unwanted noises when working and decrease the pump’s performance. It is important to regularly maintain and supervise these factors so as to prevent such failures and ensure dependable operation of hydraulic systems.
How Can Hydraulic Fluids Be Contaminated?
Hydraulic fluid contamination typically occurs through several routes, with the most common being environmental ingress, improper fluid handling, and wear debris from system components. These include inadequate sealing mechanisms which may permit entrance of moisture and dirt into the hydraulic systems during rains or dusty environments due to poor design considerations among other factors; poorly kept tools for transferring fluids and performing maintenance duties; as well as storing oil or other fluids near foreign materials like animals’ nests or open manholes on site areas not properly covered leading them into getting inside either by accident or as a result an action intended by personnel involved (Buelow et al., 2014). Consequently, such particles are generated due to abrasion experienced by pumps, valves, and other parts found inside hydraulics machinery, which comprises metal shavings alongside degraded substances that spoil liquid consistency under consideration. Regular monitoring and filtration practices must be implemented with respect to avoiding risks accompanying these concerns for optimal performance levels within the system.
Reasons Why Hydraulic Pumps Overheat
Several key causes lead to overheating in hydraulic pumps thus must be carefully considered to avoid failure. First, there may not be enough oil to lubricate because of too low levels or wrong types of hydraulic fluids that will cause more friction and heat generated within the pump itself. Secondly, high system pressure is common when a system is not calibrated properly or has some obstructions within the hydraulic circuit that make the pump work harder and, therefore, produce even more heat during operation. Thirdly, sometimes the thermal limits of the pump are exceeded due to ambient temperature variations or prolonged under higher load conditions than what it can withstand. Finally, there could be an improper working cooling mechanism, such as an external heat exchanger or internal cooling channels, which do not allow for proper dissipation of heat, and this worsens overheating. System checks done in line with laid down maintenance schedules should seek to minimize these consequences, enhancing dependability and efficiency values (Buelow et al., 2014).
Comprehending Component Wear and Fatigue
The longevity and dependability of a hydraulic system are directly influenced by two factors, component wear and fatigue. Need for this is through different mechanisms, including abrasive wear, adhesive wear as well as corrosive wear under the influence of operational environment and fluid properties. For example, surfaces can be worn off from gears and bearings because of particulate contamination in hydraulic fluid which heightens abrasive wear. However, fatigue refers to the progressive weakening of materials that occurs when they are cyclically loaded, causing microcracks to form and ultimately resulting in their failure. The key contributing factors to fatigue include the load experienced by the material, the forms of stress concentration, and its physical characteristics. It is important also to conduct regular maintenance on machines to avoid cases like downtimes due to breakdowns caused by wearing out parts thus undermining productivity levels especially those associated with vibration analysis or particle analysis so that worn-out components may be detected early enough before a complete break-down happens which will eventually become very expensive experiences if not prevented from happening in good time thereby improving effectiveness throughout the whole system at large
What is the Step-by-Step Guide to Troubleshooting?
Identify the Problem: Start with watching the system in action and describing what you see. Get a lot of information on sysmptoms and any displayed error messages.
Gather Data: Gather relevant operational data, historical performance metrics, etc., to establish conditions under which these failures occurred. This might include such parameters as system pressure readings, temperature logs or fluid analysis results.
Check for External Factors: Check external factors that could be influencing its performance like environmental conditions or power supply interruptions.
Inspect Components Visually: Perform a detailed visual checkup of all significant components to identify wear, damage or misalignment that could cause malfunctions.
Test System Conditions: Diagnose your diagnostic tools by applying them to system parameters and running the system under controlled conditions to observe how it performs under such devices, noting any deviations from expected norms.
Isolate the Problem: Splitting the systems into smaller units within subsystems can locate faults at their sources while testing individual components aids in ruling them out.
Implement Repairs: The findings will guide you on necessary repairs or replacements that should be carried out on faulty parts taking into account manufacturers’ instructions and specifications.
Verify Functionality: We then follow this up with an intensive test period that will validate if the system operates properly at normal loading levels after undergoing repairs are conducted.\
Document the Process: This involves recording all findings made, actions taken, and final outcomes for future reference and troubleshooting improvement purposes, as well as serving as team learning resource documentation.
Review and Adjust Maintenance Practices: Finally, check and review maintenance routines again to avoid repeated mistakes and improve the system’s reliability going forward.
Initial Checks You Should Perform
Conduct a Preliminary System Review: Instead of starting with a detailed diagnostic study of your system, first evaluate the overall performance history. Go through logs that contain error codes and look for recurring patterns.
Verify System Status Indicators: You should also inspect any system status lights or display indicators so that all the operational parameters must be within the prescribed ranges. Make sure no critical alarms are activated which may indicate pending equipment failure.
Check Power Supply Integrity: The power supply’s stability and sufficiency with regard to voltage levels and current ratings are needed for this purpose. The quality of the incoming power supply can be measured using a multimeter to look for changes, in its terms, which can impact performance.
Steps to Isolate the Problem Area
Identify Affected Components: Begin isolating by targeting components that appear to malfunction most frequently. Diagnostic tools such as oscilloscopes or spectrum analyzers can help determine whether individual parts are failing, particularly those shown during the initial checks.
Perform Component Testing: For example, if a specific sensor or actuator is having an issue, you will remove it from the machine and test its functions separately, independently determining whether it works within the required limits.
Conduct Systematic Bypass Procedures: Another layer of isolation is achieved through controlled bypass of various subsystems until we reach one component having an issue at a time and disconnect them temporarily in a logical way. This gives us a chance to observe how our system behaves incrementally, aiding in the identification of problematic areas.
Examine System Interconnectivity: In this section, we will assess the interconnectivity of various system components, including checking for connectivity. Disruptions in communication lines, such as faulty wiring and unfastened connectors, can cause functional faults, thereby leading to inconclusive diagnostics.
Make Use Of Simulation Tools: This software is used to simulate how systems behave under different circumstances, which may give insight into how they would function if certain portions were removed or bypassed. Thus, we can know where our failures could arise without necessarily going into fixing them physically.
How to Implement Corrective Actions
Determine Root Causes: It is important to start by understanding deeply what causes the identified issues. Employ Failure Mode and Effects Analysis (FMEA) to prioritize the issues according to their potential influence on system performance. This technique helps direct corrective actions.
Create an Action Plan: A properly planned sequence of activities should be laid down that shows all necessary steps in addressing these root problems. The plan should have goals, specific tasks, timeframes with clear milestones, people responsible and resources needed for implementation so as not to leave room for ambiguity during accountability.
Execute Changes: Follow the action plan’s list of remedial procedures accordingly, like replacement or repair of affected parts, updating system firmware or training users on new operational protocols, etcetera with constant monitoring towards ensuring strict adherence.
Testing and Validating: Ensure that after corrective measures are taken, sufficient inspections are done to validate improvements achieved to date by using diagnostic tools and operating metrics as previously applied within normal operating conditions’ assessment checklists when measuring functionality.
Record Changes And Outcomes: These records provide a full knowledge base for all actions taken, including reasons why they were selected for implementation over other available alternatives and practical steps taken during this process. Such references are useful in troubleshooting and continuous improvement purposes.
Evaluate and Adjust: Check if the corrective actions are still effective as time goes by; seek suggestions from operators; carry out regular system reviews to identify new concerns and areas that could be improved upon, adjusting guidelines accordingly to maintain the best possible system performance.
What Are Advanced Troubleshooting Tips?
Troubleshooting that is advanced needs a logical way of diagnosing complicated problems. The first step would be to apply the five whys technique which requires asking why repeatedly to get at the root cause of an issue. This method is useful in surfacing underlying problems that may not be immediately obvious. Secondly, diagnostics tools such as network analyzers and performance monitoring software could be employed to gather data on system behaviour under different conditions. These are instruments that can help identify abnormality that may indicate more significant issues. Lastly, think about implementing a cross-functional team-based collaborative troubleshooting approach. It would take various views into account and has potential innovative answers and a better understanding of systemic problems. This multifaceted approach helps resolve advanced technical challenges quickly.
Advanced Diagnostic Equipment
For efficient identification and resolution of complex system issues, advanced diagnostic equipment is needed. Firstly, ultra-sensitive devices like oscilloscopes, spectrum analyzers, or multimeters provide important information about electrical signals, circuit operation, and waveform characteristics. These devices allow engineers to visually represent electronic system operations in order to locate specific breakdowns quite easily. Thermal imaging cameras can indicate overheating components by identifying hot spots while endoscopic cameras offer inspection inside machines without taking them apart. Additionally, predictive maintenance tools are integrated with other software solutions for the purposes of analyzing collected data over time, thus predicting possible failures before they occur.These advanced diagnostic tools can improve accuracy during assessment, thereby guiding the decision-making process more effectively, leading to improved operational efficiency.
Analyzing Hydraulic Fluid Samples
The analysis of hydraulic fluid samples is one important practice in ensuring hydraulic systems’ reliability and performance. Such a process normally involves the collection of fluid samples from different points within the hydraulic system, which are then tested for any contamination level, fluid degradation, or wear particles present in it.Particle counting techniques, including laser particle counters, measure the size and number of particles suspended within liquid, hence giving insight on potential wearing out or system wear out.The commonly used techniques for this purpose include Fourier Transform Infrared Spectroscopy (FTIR) and Atomic Absorption Spectroscopy (AAS). Besides, it is possible to perform a variety of tests, including laser particle counters that measure the size and number of suspended particles in a fluid, thereby giving an idea about possible worn-out parts or system degradation. Regular analysis not only aids in early detection of issues but also guides maintenance decisions, ultimately extending the lifespan of hydraulic components and enhancing overall system efficiency.
When to Consult Manufacturer Support
If there are unresolved issues that cannot be fixed through normal troubleshooting procedures then it is advisable to seek manufacturer support. There are specific scenarios such as continuous operational breakdowns, unusual system behavior, and also when diagnostic tools identify faults that might need assistance. Moreover, one should consider talking to the manufacturer support after conducting maintenance if there is doubt as to whether proper procedures were followed or if post-maintenance new challenges present themselves. Further, contacting manufacturer support may help clarify warranty coverage, software updates availability, or obtain information on product improvements. Overall, manufacturers’ expertise ensures adherence to safety regulations while also optimizing equipment performance.
Summary: This troubleshooting guide provides detailed steps for diagnosing and fixing common electrical issues in DC hydraulic power units, emphasizing the importance of a proper ground connection to prevent low battery simulation.
Summary: This article outlines specific causes of hydraulic pump failures, such as low battery voltage and poor ground connections. It also addresses mechanical issues like worn-out packing on cylinder rods and directional valve malfunctions.
Summary: The guide from Sure-Trac offers comprehensive instructions for troubleshooting KTI hydraulic power units. It covers both electrical and hydraulic circuit interactions, helping users identify and resolve common problems efficiently.
Frequently Asked Questions (FAQs)
Q: What are the key components of a KTI hydraulic pump?
A: The key components include the pump motor, hydraulic fluid reservoir, control valves, and hydraulic cylinders.
Q: How often should I perform maintenance on my KTI hydraulic pump?
A: Regular maintenance should be performed every 3 to 6 months, depending on the usage and operating conditions.
Q: What type of hydraulic fluid is recommended for KTI hydraulic pumps?
A: KTI hydraulic pumps typically use ISO 32 or ISO 46 hydraulic fluid, but it’s best to consult the manufacturer’s manual for specific recommendations.
Q: How can I tell if my hydraulic pump is failing?
A: Common signs of failure include unusual noises, decreased performance, fluid leaks, and overheating.
Q: What should I do if my hydraulic pump is making unusual noises?
A: Inspect the pump for signs of wear, check the hydraulic fluid level, and ensure there is no contamination or buildup within the system.
Q: How do I check for hydraulic fluid leaks in my system?
A: Examine the hydraulic lines, connections, and the reservoir for any visible signs of leaks. Also, check the relief valve and seals for integrity.
Q: What causes hydraulic fluid contamination?
A: Contamination can be caused by dirt, debris, water ingress, or degradation of the hydraulic fluid over time.
Q: How can I diagnose a decrease in hydraulic pump performance?
A: Perform a visual inspection, check for proper fluid levels, and use diagnostic tools to assess the system’s pressure and flow rates.
Q: What are common reasons for a hydraulic pump to overheat?
A: Overheating can be due to excessive workload, inadequate cooling, contaminated fluid, or internal component wear.
Q: When should I consult the manufacturer for support with my hydraulic pump?
A: Consult the manufacturer if you encounter persistent issues that cannot be resolved through standard troubleshooting steps or if you require specialized diagnostic tools and expertise.
We need your consent before you can continue on our website.If you are under 16 and wish to give consent to optional services, you must ask your legal guardians for permission.We use cookies and other technologies on our website. Some of them are essential, while others help us to improve this website and your experience.Personal data may be processed (e.g. IP addresses), for example for personalized ads and content or ad and content measurement.You can find more information about the use of your data in ourprivacy policy.
If you are under 16 and wish to give consent to optional services, you must ask your legal guardians for permission.We use cookies and other technologies on our website. Some of them are essential, while others help us to improve this website and your experience.Personal data may be processed (e.g. IP addresses), for example for personalized ads and content or ad and content measurement.You can find more information about the use of your data in ourprivacy policy.Here you will find an overview of all cookies used. You can give your consent to whole categories or display further information and select certain cookies.