Your hydraulic pump performs several important roles in the maintenance of performance and life of Gravely equipment so that the machine can work smoothly. Its efficiency may get reduced with wear and tear, which affects the function of the machine and may even cause it to shut down. From restoring the performance of your equipment, a rebuilt pump is an inexpensive alternative to full replacement. In our thorough Gravely Hydraulic Pump Rebuild Kit Guide, we will discuss just about every aspect of the kit and will give you a step-by-step walkthrough, insights, tips, and useful tools to get your job done right. So whether you’re an old hand in rebuilding or enthusiastic about doing it like one, this guide will equip you with confidence.
Understanding the Gravely Hydraulic Pump
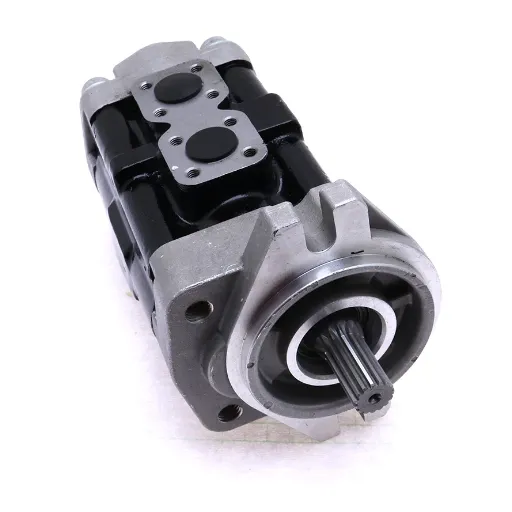
What is a Hydro Pump?
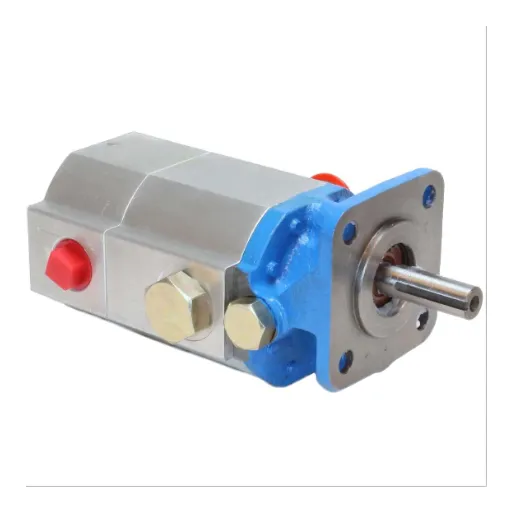
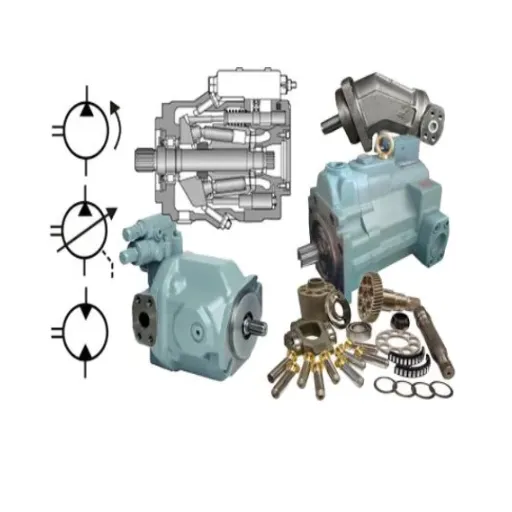
A hydro pump, usually recognized as a hydraulic pump, is a mechanical device that converts mechanical power into hydraulic energy. It generates the flow and pressure for hydraulic fluid to transfer energy from one point to another within a system; thus, things get powered like lifting arms, wheel motors, and other moving parts in hydraulic machinery.
The pump stands as one of the chief components in a hydraulic system, and more so with an equipment such as Gravely mower; here, it delivers power timely to drive systems and attachments so smoothly. The pressurized hydraulic fluid by the pump allows for controls to be operated smooth and precise, fulfilling performance criteria of the equipment. The hydro pump, which works properly, is essential to either maintain power or right down the reliability of the machine.
Designed to be subjected to extremely high pressures and demanding operating conditions, hydro pumps require maintenance to achieve long-term performance. In time, the seals, valves, or other internal components can suffer from wear and tear, causing a loss in efficiency or complete failure. Repairing the pump with a special kit, such as the Gravely hydraulic pump rebuild kit, helps to restore functionality and save some life for the equipment instead of going for a full replacement. Having an appreciation of the hydro pump and its maintenance needs would help optimize the performance of any hydraulic machinery.
Components of the Gravely Hydraulic Pump
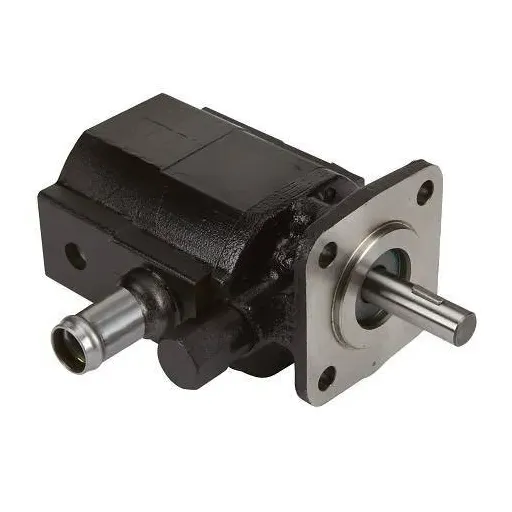
There are several components involved in the operation of the Gravely hydraulic pump acting as a core unit, all of which interdepend upon each other to enable smooth and efficient functioning. Major components include the housing, which serves to enclose the pump and give it structural support, while the pistons or gears actually move the hydraulic fluid under pressure. These working parts generate the force needed for the machine to operate efficiently.
Another important element is the valve assembly, which directs the flow of the hydraulic fluid. This valve arrangement ensures that the fluid is correctly diverted to carry out a particular operation, helping in the retention of pressure within the system, thus maintaining efficiency. Seals and gaskets else form the seals and gaskets vital for retaining pressure within the pump and preventing fluid leakage.
These filters are meant to trap any contaminants that may have found their way into the hydraulic fluid and thus protect the internal parts from harm while ensuring that it will work for a long time. If these components could be well maintained and inspected from time to time, it would go far in making sure that the Gravely hydraulic pump performs well and lasts longer.
Common Issues with Hydraulic Pumps
Like all mechanical systems, hydraulic pumps too undergo certain common problems affecting proper performance. Lack of sealing is mostly a problem for hydraulic pumps due to worn-out or damaged seals and gaskets. Thus, leaks reduce efficiency and hydraulic pressure dropping, thereby leaving the system inept in effectively working. One can check the seals at regular intervals and replace them when needed.
Overheating is yet another problem-a pump may overheat due to excessive friction, insufficient hydraulic fluid levels, or fluid contamination. Overheating may prematurely wear the components and may shorten the life of the pump. Proper checks on the fluid levels and routine cleaning of the system, apart from using recommended hydraulic oils, should go a long way toward eliminating overheating problems.
Lastly, cavitation or air contamination may pose problems to hydraulic pumps. Air is usually introduced into the system through loose fittings or damaged components; this may lead to reduced system performance and noisy operation. The bubbles produced during cavitation from low fluid level or restricted flow may be detrimental to pump components over a period. Checking fluid level, installation, and integrity of the system should help in preventing these issues. Thus providing for maintenance and inspection in due time can go a long way in saving the handsome amount of resources involved in repairs and operational halts.
Identifying the Need for a Replacement Pump Kit
Signs Your Hydro Pump Needs Replacement
Over time, wear and tear can erode the efficiency and reliability of your hydro pump. Here are some indicators to consider before deciding on its replacement:
- Reduced Fluid Pressure – A decrease in fluid pressure can hint at internal damage or wear in the pump components hindering its operation.
- Unusual Sounds – Grinding, whining or rattling can signify mechanical malfunctions such as worn bearings or misaligned parts.
- Leaks – Fluids leaking out visibly from the pump or at the connections can indicate seal failure, which, if not rectified, might cause further damage.
- Overheating – A lot of heat and less efficiency from the pump are the tell-tale signs of aging or failing components.
- Frequent Repairs – It would be worth considering a new pump if you are repeatedly fixing the same problem.
- Age of the Pump – The majority of these pumps have a particular life span. If your pump has reached or has surpassed the half-life of its service, a changeover should thus be made to avoid unexpected failures.
Being cognizant of these few signs can toll the bells of unplanned outages and keep your system performance running optimally. Keeping a close eye on the data produced by the diagnostic tools and performance monitoring helps maintain informed decision-making with which they undertake their maintenance work. Keeping abreast of updates with the latest industry standards assists you in pinpointing replacement kits that suit your system specifications.
Benefits of Using a Replacement Pump Kit
Improved System Performance
An efficient pump kit, by replacing worn-out or old components, ensures that the system works to its highest potential. This action reduces inefficiencies and helps to maintain consistent outputs, thus reducing downtime.
Cost Savings on Repairs
Intervening early on when bad parts in the system are replaced generally prevents the entire system from sustaining major damage, which in turn saves huge sums of money to be paid in repair or total replacement. A replacement kit is more cost and time effective when used early upon need.
Improved Durability and Longevity
The parts included in the replacement kits are also designed to stand wear and tear associated with normal operations of the system. Therefore, when you select top-quality parts for an upgrade of your unit, this will further extend the life of your equipment.
Less Unplanned Downtime
By replacing parts at the right time, it helps in lowering unexpected occurrences of downtime. The best replacements will help keep the workflow running smoothly, and that way will increase the productivity levels.
Conforming to Industry Standards
Modern replacement pump kits are built in accordance with the latest industry standards, representing the best option for keeping your system current while maintaining regulatory compliance and ensuring that it remains safe to operate and efficient.
Preparing for Your Hydraulic Pump Rebuild
Gathering Necessary Tools and Materials
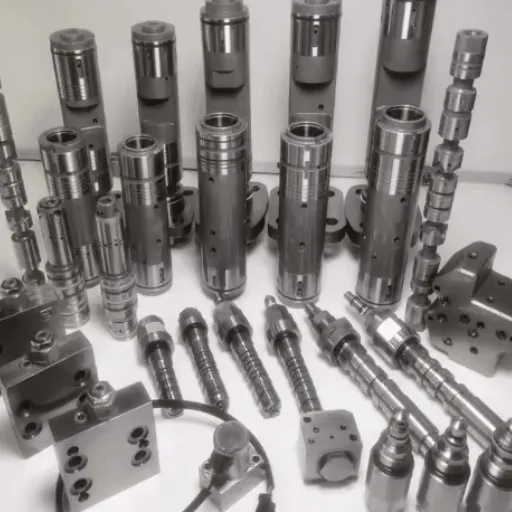
The hydraulic pump rebuild preparation must go through careful planning and must have the right tools to carry out the entire process. A diversified set of hand tools comprising something like wrenches, screwdrivers, pliers, and socket sets would be needed to disassemble and reassemble many components. Other tools that may be specialized are torque wrenches or bearing pullers, which are required for the minute details of some components in the hydraulic pump system. Lubricants, cleaning agents, and a spotless work area would help maintain the smooth functioning of parts throughout the rebuilding process. If possible, keep a proper manual for your particular pump model on hand since it includes step-by-step information on how to properly dismantle.
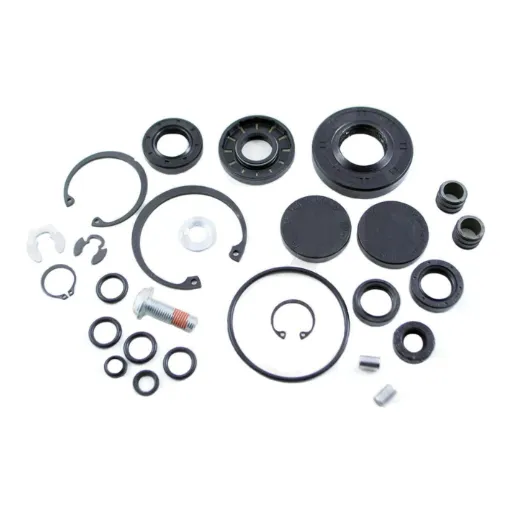
Rebuild kits should comprise all the seals, O-rings, gaskets, and other crucial parts that may wear with time. Do not forget thread-high-quality replacement parts and an ultradependable rebuild kit. And always check the compatibility, as noncompatible parts could reduce pump performance or might even cause the pump to fail after reassembly. For added convenience, keep your workings and components in a labeled tray so that there will hardly be instances of confusion occurring in between, thereby also helping cut down the time taken for assembly.
In this entire setup, the last but not the least consideration is the safety measures involving PPE, which shall include gloves, goggles, and industrial-grade overalls to guard you against any hazards. A contamination-free environment must be ensured to prevent dirt or debris from entering sensitive parts of the pump during the rebuild. By ensuring all tools and materials are prepared beforehand, the rebuild process will be less stressful, downtime will be reduced, and the time span of your hydraulic pump will be extended.
Understanding the Rebuild Process
Inspection and Diagnosis
Scour the pump for obvious signs of wear, damage, and/or contamination. Among common faults are leaking seals, scored internal components, or uneven wear of internal components. Less obvious faults can be highlighted with diagnosis tools such as pressure gauges or flow meters that are to be addressed in the rebuild.
Disassembly
Disassemble all the pump parts, following the recommendations of the manufacturer. Label the components in an orderly manner to avoid confusion during reassembly. Identify the parts that require replacement; check the seals, bearings, and gaskets to decide upon their inclusion.
Cleaning and Preparing
Clean all parts thoroughly with a suitable solvent, followed by an appropriate drying method. The presence of even a few particles of dirt or solvent residue may cause contamination and premature failure of the pump when it goes back into service. After cleaning, examine the parts using proper lighting to detect any micro-damage, cracks, or irregularities.
Replacement of Worn Parts
All faulty or worn components must be replaced with the best quality parts accepted by the manufacturer to preserve the equipment’s perfect original performance standards. These may be seals, o-rings, pistons, or any other moving parts essential for the unit to operate.
Reassembly
During reassembly, all parts must be correctly aligned and fastened according to the manufacturer’s torque specifications. Fresh lubricants and sealants should be applied where required, and the seating of all seals must be double-checked.
Testing and Calibration
Upon reassembly, the pump shall go for testing to ensure that it is performing as intended. This involves putting it under pressure testing, flow rate testing, and checking general applicability. If required, make some adjustments for fine-tuning to meet the standards of operation.
Documentation and Maintenance Notes
An rebuilt one, with parts exchanged and adjustments performed. A maintenance schedule needs to be established to check on pump-performance with respect to ongoing reliability and efficiency.
By applying these steps with due association to new tools and techniques, any hydraulic pump rebuild will gain in quality while guaranteeing durability and reducing its operational costs in the long run.
Safety Precautions to Take During Rebuild
⚠️ IMPORTANT SAFETY GUIDELINES ⚠️
One must be particularly cautious regarding the safety protocols before attempting to undertake rebuilding of a hydraulic pump to safeguard both the persons involved and the equipment. Before any procedure is started, professionals or technicians are required to wear their PPE, including safety goggles, gloves, and safety boots, to avoid cases of injury by sharp edges or pressurized fluids. All of these will need to be maintained in a well-lit area and kept nice and tidy to avert accidents that may otherwise cause impairment to delicate pump parts.
Likewise, ensure that proper depressurization of a hydraulic setup is carried out. Residual pressure within the hydraulic lines could spur sudden violent fluid ejections, inflicting potential injuries such as burns, or ocular hazards, or even surface contamination. This removal of any pressure remaining could be done by following manufacturer’s instructions and utilizing the proper tools. Similarly, care should be taken to seal all disconnected components properly during the rebuild in order to keep dirt or debris(aggravating agents), which might hinder the functioning and longevity of the rebuilt pump, from getting inside.
Lastly, to restore hydraulic machinery, lockout/tagout (LOTO) practices must be conducted to provide positive assurance that the hydraulic system cannot be activated while the repairs are being performed. Lockout/tagout power sources and hydraulic controls to avoid their accidental usage. Secondly, maintain a detailed checklist of all replacement parts that meet the OEM standards for compatibility and safety. By observing these safety measures, the rebuilding process increases the reliability of equipment while promoting a safety consciousness in the workplace.
Step-by-Step Guide to Installing the Replacement Pump Kit
Disassembling the Existing Pump
- Ensure the system is powered down and depressurized: Ensure that the whole system is safely powered off and depressurized with respect to the pump before disassembly. This will prevent accidents or fluid really from escaping during the process.
- Disconnect fluid lines: Carefully open all fluid inlet and outlet lines to and from the pump. Use suitable containers to collect any dropping fluid and prevent it from spilling, in order to dispose of it accordingly, following the set environmental regulations.
- Label and organize components: Label all hoses, bolts, and other mounting hardware as they are removed from the pump for later proper reassembly. Use small containers or bags to keep screws, gaskets, and fittings grouped together in a neat, orderly fashion.
- Inspect for wear or damage: While removing the pump, check all surrounding components for wear or damage, especially seals, gaskets, or any adjacent parts, replacing any faulty ones to preserve system integrity.
- Documenting the disassembly: Great care must be taken to take pictures or detailed notes during the dismantling process. This documentation will serve as a valuable visual aid during reassembly and to avoid mistakes.
By following these steps in an orderly fashion, one can achieve fast, safe disassembly and a smooth installation of the replacement pump kit.
Installing the New Parts from the Kit
- Prepare the replacement parts: Start by arranging an item and ensuring it is on the parts list. Check off if all the required parts are present or not, and make sure there are no defects or damages. This way, you will not have interruptions midway during installation.
- Mount the pump assembly: Carefully place the new pump into position and align it with the existing mounting points. Place the bolts and any other fasteners provided with the kit and tighten them to the manufacturer’s specified torque to prevent the pump from working improperly or being loose.
- Reconnect piping and hoses: Reattach piping, hoses, and fittings to the new pump. Check all connections for alignment and ropes. Apply sealant or thread tape to the connections if recommended in the instructions provided in the kit.
- Attach the electrical components: Electrical wiring should be connected to the pump following labels and diagrams that you documented during disassembly. Make sure the connections are well secured and properly insulated to avoid any electrical hazards during operation.
- Testing the Installation: Now the system is ready for a preliminary test; run it with low capacity after reassembly. Keep an eye out for any irregularities, such as leaks to abnormal noises, and fix them right away. Then, go ahead to raise the capacity to full and verify the pump operates accordingly.
The meticulous installation of the kit’s new parts coupled with careful steps will guarantee optimal operation and dependability of the system while avoiding post-installation problems.
Reassembling and Testing the Hydro Pump
During reassembly, I make sure that each component is carefully aligned with the manufacturer’s specified orientation so as to fit together securely and create no problems during operation. I ensure all the bolts and fittings are tightened to the right torque specifications, and that seals are set properly to keep them from leaking. One should be slow at this stage so that they are not misaligned or missed in any way, thereby compromising system performance.
Once it is all done, the pump is started for a pretest at low capacity, during which any irregularities such as unusual noise, leaks, or vibrations are observed with much attention. The moment any abnormality is observed, immediate rectification is undertaken before moving on. This stage is crucial since it makes sure little problems are nipped in the bud before they become big ones.
When satisfied with the operation of the system on low capacity, the next step is to bring it gradually up to full capacity so as to check that the hydro pump operates efficiently and according to design. By strictly following such procedures, I can confidently state that the pump is good for reliable long-term service.
Maintaining Your Hydraulic Pump Post-Rebuild
Regular Maintenance Practices
Precise maintenance of a hydraulic pump after rebuilding will allow it to perform in a reliable manner for a long time. Routine checks have to be done first in the maintenance program, including leakage checks and inspecting hoses and fittings for deteriorations. All connections should be checked to confirm they are tight enough. It is also essential to keep a regular check on the hydraulic fluid. The fluid should have enough levels and be free from any contamination. It is common knowledge that if the fluid has been compromised or is dirty, it will drastically minimize the hydraulic system’s effectiveness and cause damage over time.
Another important part of maintenance is to stick to the scheduled routine. Change the filters at the intervals specified by the manufacturers to prevent contaminants from reaching the pump’s vital components. It is also a good idea to keep an eye on any unusual system noises, vibrations, or heat, since these may point toward an issue that needs urgent attention. Finally, lubricate all moving parts, as this reduces friction and prevents overheating, thus adversely affecting pump performance.
In addition to inspections and preventive maintenance, training must be imparted to personnel operating and maintaining the pump. Training operators in best practices prevents wear resulting from improper maintenance. Furthermore, an adequate record of maintenance and repairs will provide insight into the service history of the pump so as to assist in identifying recurrent faults and improve maintenance strategy. With these practices, you are enhancing the operational efficiency and reliability of your hydraulic pump, thereby improving the long-term performance of your equipment.
When to Seek Professional Help
A certain kind of hydraulic pump issue exceeds the scope of in-house repairs even if on preventative maintenance and best practice maintenance are given. It is important to call the professionals when the pump exhibits contamination, severe leakage, or noise larger than it should be during operation. Usually, these problems indicate internal damage or failure of seals, valves, pistons, etc., which require detailed diagnosis with specialized equipment best handled by a professional workshop.
Another reason to involve professionals is recurring failures even after routine repairs. When a hydraulic pump turns out to be defective or ill-performing notwithstanding servicing, the underlying cause could be complex or hidden defects like misalignment, contamination through the hydraulic fluids, or structural wearing of certain components. With their expertise and tools, professional technicians can treat or repair the hidden issues in a manner that maximizes equipment life.
Furthermore, consulting experts while upgrading or replacing hydraulic systems will establish compatibility between new components and existing machinery. They can assess system requirements and advise on the most cost-effective solutions while installing them with pinpoint accuracy. Their know-how will take care of the immediate issues while ensuring the long-term operational reliability and efficiency of your hydraulic equipment.
Frequently Asked Questions (FAQ)
❓ Common Questions & Expert Answers ❓
Q: What is a rebuild kit for a Gravely hydraulic pump?
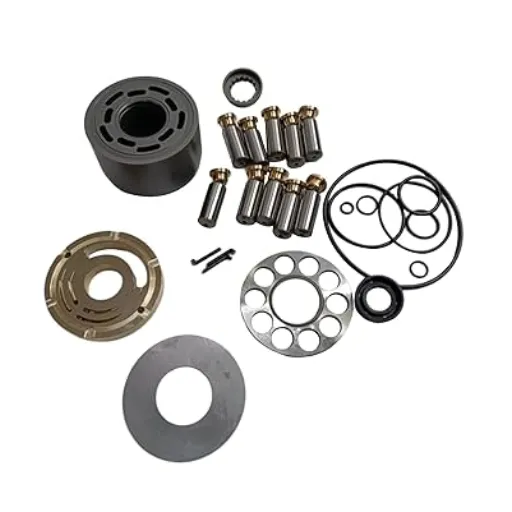
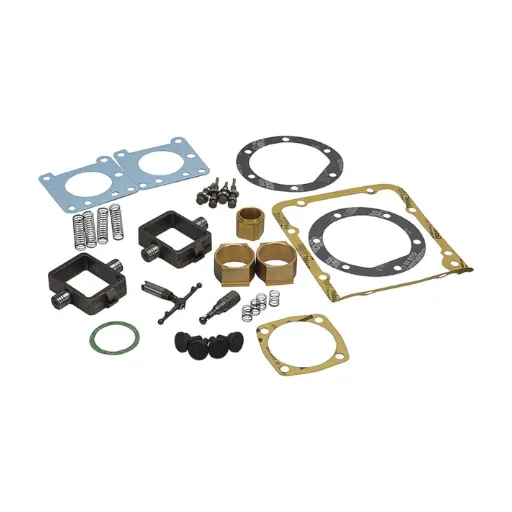
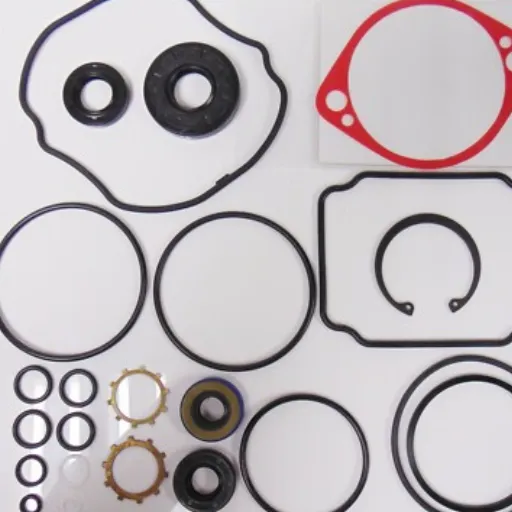
It could be described as a kit containing parts essential to reinstating the working condition of a Gravely hydraulic pump. In general, the kit contains various seals, gaskets, and other parts so as to completely overhaul the pump and put it into working order.
Q: What does the rebuild kit for a Gravely hydraulic pump contain?
The kit contents of a Gravely hydraulic pump rebuild could vary, though usually it contains the basic components needed for rebuilding such as O-rings, seals, bearings, and sometimes a cover plate or other parts of the pump specific to the model. These parts provide the base in a hardware sense upon which a successful rebuild that delivers good working performance is done.
Q: How could I possibly determine if I need a rebuild kit for my Gravely hydraulic pump?
When decreased hydraulic performance, leaking, or unusual noises seem to emanate from the pump, maybe your Gravely hydraulic pump could use a consideration for rebuild. Such actions can be taken in response to problems by a rebuild kit, thus replacing worn or damaged components.
Q: Where can I buy a Gravely hydraulic pump rebuild kit?
Kits for rebuilding Gravely hydraulic pump applications are sold by an authorized dealer, on online marketplaces, and by some specialty retailers who deal with hydraulic parts. But one must make sure whether the kit that one is buying matches the pump part number to be compatible with their unit.
Q: How much time is required for rebuilding the Gravely hydraulic pump with the assistance of its rebuild kit?
In fact, the number of hours one will need to rebuild a real Gravely hydraulic pump with a rebuild kit will depend upon one’s mechanical skills and experience, along with the types of pumps they have. In general, it will take from a couple of hours to one full day in doing the rebuilding.
Q: Can I install it myself?
Well, yes, if you’re equipped with fundamental mechanical skills and tools, you could very well install a Gravely hydraulic pump rebuild kit yourself; but it is very important that you follow the manufacturer’s instructions and guidelines so that the rebuild turns out well.
Q: Any maintenance tips after installing a Gravely hydraulic-pump-rebuild kit?
Regular maintenance is required after the installation of a Gravely hydraulic-pump-rebuild kit. Keep the unit clean, check for leaks from time to time, and ensure the hydraulic-fluid level is up so that your pump may have a prolonged life.
Q: What if my Gravely hydraulic pump develops other problems after a rebuild kit is applied?
Should your Gravely hydraulic pump keep failing even after the application of rebuild kit, it means that you are probably faced with a bigger problem, in which case you might have to have it looked at by professionals and/or require diagnostics to identify and finally correct that underlying problem.
🎯 Conclusion
With this comprehensive guide, you now have all the knowledge and tools needed to successfully rebuild your Gravely hydraulic pump. Remember that proper maintenance and timely repairs will extend the life of your equipment and ensure optimal performance for years to come.